-
Welcome to the new SAOCA website. Already a member? Simply click Log In/Sign Up up and to the right and use your same username and password from the old site. If you've forgotten your password, please send an email to membership@sunbeamalpine.org for assistance.
If you're new here, click Log In/Sign Up and enter your information. We'll approve your account as quickly as possible, typically in about 24 hours. If it takes longer, you were probably caught in our spam/scam filter.
Enjoy.
You are using an out of date browser. It may not display this or other websites correctly.
You should upgrade or use an alternative browser.
You should upgrade or use an alternative browser.
Sunbeam 2000 build
- Thread starter belmateo
- Start date
belmateo
Gold Level Sponsor
Excellent article here on fuel tank restoration. Thanks Mike!
belmateo
Gold Level Sponsor
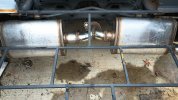
New gas tanks are built and pressure tested. Mufflers and tail pipes (Stainless Steel) installed yesterday between sun and rain. The radio antenna base I will use is flat, so I had to fab a base at the top of the quarter panel to mount and seal it. Pics up when I can get them taken and posted. Happy New Year!
belmateo
Gold Level Sponsor
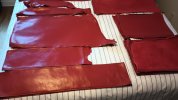
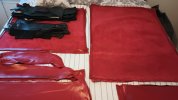
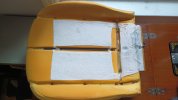
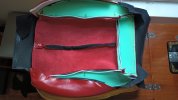
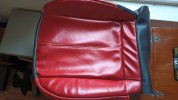
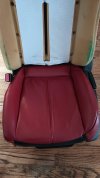
Winter is upon us so work has shifted to indoors mostly. I wanted to do a tan interior but all the samples I got just were not what I was looking for. Was going to purchase new leather cowhide to stitch up the seats and door panels in red. Not cheap and shipping time really sucks these days. While checking craigslist™ I came across some FREE red leather (more then I need) so I grabbed as it was at a neighbors house less than five minutes away!
Got it home and took it apart and got all the panels separated to I can strated working on the seats. I have the patterns already saved don't have to take out the seats right now and tear them down.
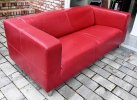
Got it home and took it apart and got all the panels separated to I can strated working on the seats. I have the patterns already saved don't have to take out the seats right now and tear them down.

Aladin Sane
Diamond Level Sponsor
Better hurry, it looks like more rain headed your way.
belmateo
Gold Level Sponsor
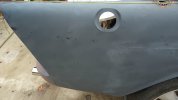
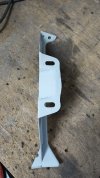
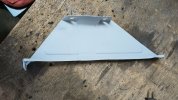
I was able to get the trunk floor pan done with two pieces since they had to slide under the frame rails near the fuel tanks. All welded in so now will finish the small part above the rear sway bar and get some seam sealer laid down before primer and paint. Then I will put down some sound deadener since both mufflers are near the trunk. Then onto the dreaded trunk lid and hinges. I will probably have to make my own hinges because the trunk lid has a different shape near the PRHT boot lid.
belmateo
Gold Level Sponsor
Finally got the trunk floor done and seam sealed between raindrops LOL. The interior is on hold until I receive some more thread, I have to use Polyester bonded as it is the strongest and will not unravel. Along with that, had to get needles with larger eyes. Also started to resize the trunk lid. Spring can not get here soon enough! Daylight savings time is just around the corner WooHoo
Jay Laifman
Donation Time
I'm sorry. Can you remind me what this second car is? The first one was an S2000 with an Alpine body stretched and reshaped to go over it. What is this one?

