-
Welcome to the new SAOCA website. Already a member? Simply click Log In/Sign Up up and to the right and use your same username and password from the old site. If you've forgotten your password, please send an email to membership@sunbeamalpine.org for assistance.
If you're new here, click Log In/Sign Up and enter your information. We'll approve your account as quickly as possible, typically in about 24 hours. If it takes longer, you were probably caught in our spam/scam filter.
Enjoy.
You are using an out of date browser. It may not display this or other websites correctly.
You should upgrade or use an alternative browser.
You should upgrade or use an alternative browser.
Sunbeam 2000 build
- Thread starter belmateo
- Start date
belmateo
Gold Level Sponsor
Scotty, Thanks
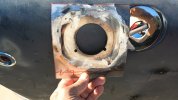
The vent routing is the same and will tie all three tanks together. The supply side is a 3/8" feed to electric fuel pumps ( one per tank) so no crossover will be used. The driver side will also be fitted for fueling that tank. It will overflow to the chassis main tank over the rear axle.
The vent routing is the same and will tie all three tanks together. The supply side is a 3/8" feed to electric fuel pumps ( one per tank) so no crossover will be used. The driver side will also be fitted for fueling that tank. It will overflow to the chassis main tank over the rear axle.
Aladin Sane
Diamond Level Sponsor
I can see that influencing your next build.
windlessdog
Donation Time
Agree Karl does an awesome job of explaining his panel as does carter auto restorations , you've got to love people that share their skill sets on you tube except for the how bad you can feel about your self when your work is very average compared to theirs


![IMG_20240605_115511788[1].jpg IMG_20240605_115511788[1].jpg](https://forum.sunbeamalpine.org/data/attachments/29/29402-a2fc88c9bd3d39ed2a8943b37b16bf04.jpg)
