• Welcome to the new SAOCA website. Already a member? Simply click Log In/Sign Up up and to the right and use your same username and password from the old site. If you've forgotten your password, please send an email to membership@sunbeamalpine.org for assistance.

    If you're new here, click Log In/Sign Up and enter your information. We'll approve your account as quickly as possible, typically in about 24 hours. If it takes longer, you were probably caught in our spam/scam filter.

    Enjoy.

The DuraPine

Bill Blue

Platinum Level Sponsor
This thread is going to show my attempts to produce a drivable Alpine, powered by a Ranger Duratec 2.3. As such, it will start pretty much where my old thread ended.

I suppose the first step is to introduce the recipient. It is a Series V. Hardly anything about it is stock except for the steering. It first saw life under my hand as a Pinto 2.0 set up blowing through a Fish carb. Lots of action, long sad story. Short story, the turbo started loosing oil, did not turn freely and the float in the Fish sprung a leak and sank. So I removed the turbo and Fish and installed a Weber 32-36 while working the wrinkles out of the installation on my rusty parts car.

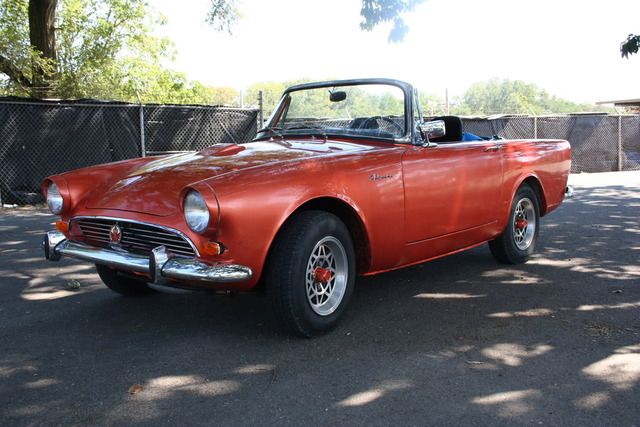
Anyway, here it is. My wife has christened it "The Orange Monster", although she insists it is more of a copper color. No, I can't figure that one out.
IMG_0353.jpg


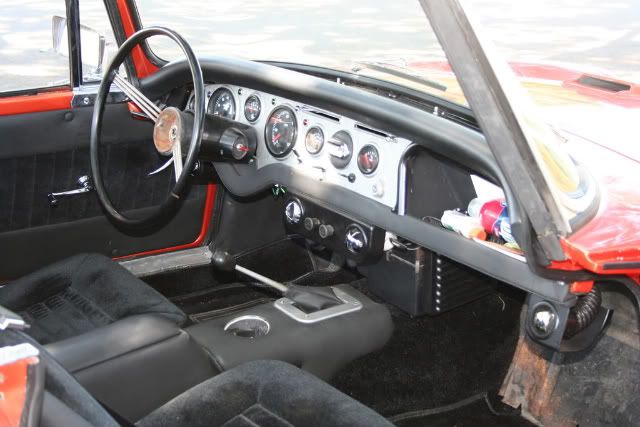
Shot of the interior. As you can see, nothing except the steering wheel and some switches are stock. The dash is a modified Series II. Note the in dash A/C. That is going to present some problems.
IMG_0364.jpg


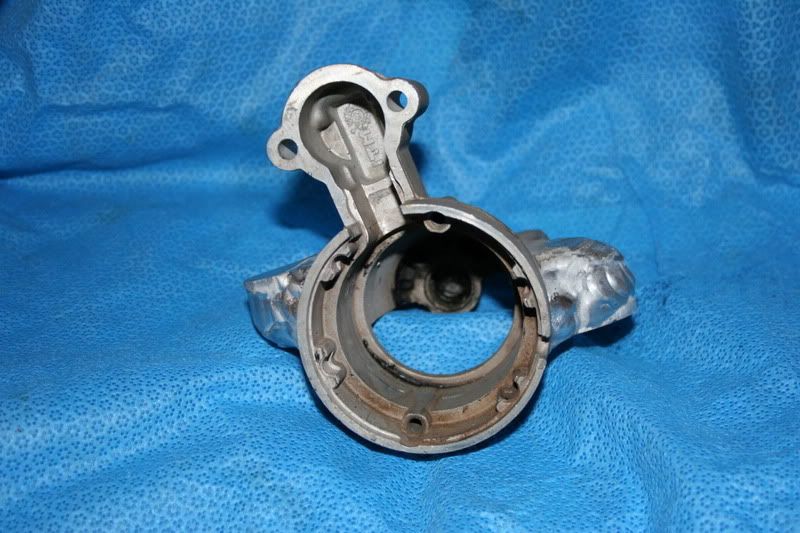
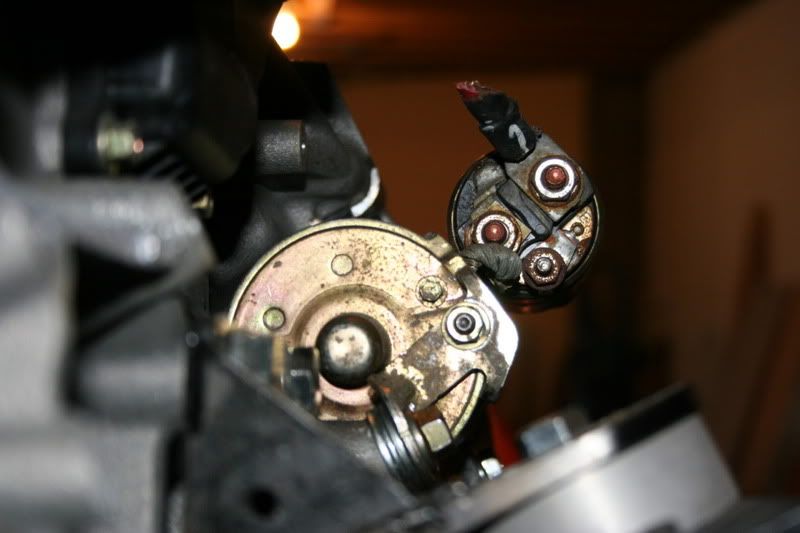
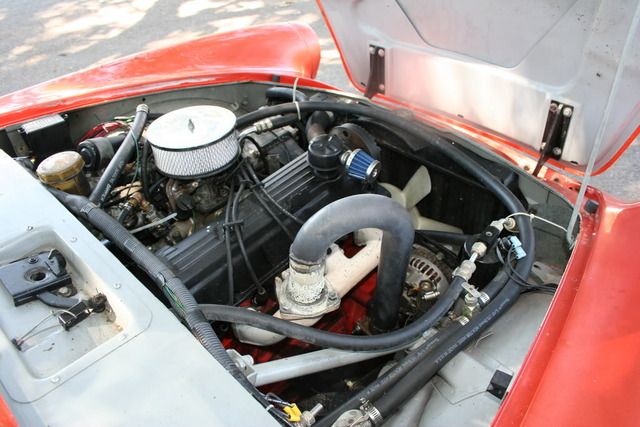
Here is the "boiler room" after the turbo was removed and the 32-36 installed. Not pretty, but it kept it on the road for a driving season. Notice the crinkled paint on the left front fender? The result of a gasoline fire, started while adjusting the Weber. If not for a disposable fire extinguisher, the whole car would have been toast.
IMG_0372.jpg


Can someone tell me how to shrink the photos? They recently became oversized only on this forum.
Bill
 

Bill Blue

Platinum Level Sponsor
Brakes are among the non-stock items on the car. Here are the fronts, 10.5" Pontiac Grand Prix rotors and GM " Metric calipers. Not especially pretty, but there is not an Alpine in the world with bigger brakes inside of 13" wheels. It is possible to go to 11.5" (correction, 11 1/4") rotors when using 14" wheels.
IMG_1131.jpg


Here are the rear brakes, 9.5" Saturn. The good news, parking brake on both wheels using modified Alpine linkage!
IMG_1207.jpg


The rear axle is Ford 8". Here you can see how I did the shock mount and some of the PB linkage.
IMG_0717.jpg


Bill
And I've cut the front springs one inch.
IMG_1129.jpg
 

bobw

Donation Time
Best of luck with your new project Bill. I'm sure glad you had that fire extinguisher handy. It would have been a shame to loose what appears to be a pretty straight car.

If you do a Google search for "shrink jpg" and maybe include your operating system, you should find some programs that will work. XP has a free download from Microsoft called "Image Resizer". Not sure what's equivalent on the other versions.

Your car appears to be about the same color mine is now, but I'm scheduled in the body shop Monday, and it's going back to the original Signal Red. Might as well have something original on it. :)

Bob W.
Rotary Alpine
 

Andrew

SAOCA Web/Graphics Service
Donation Time
Hi Bill

Hi Bill,
It is good to see your post. A quick and easy way to resize photos if you are running any windows system is to email the photo to yourself???

Go to your
File Manager or Windows Explorer and go to the directory that has your pictures.
Highlight one of your photos and hit the right mouse button.
Click Send To.
Click on mail recipient.
A box will come up with the heading Send Pictures via E-Mail
Make sure that "Make all my pictures smaller" is clicked and then say OK
Your email window will open and put your address and fire it off to yourself.
This will take a copy of your photo, resize it and mail it to you in one step.
I hope this will help.

Regards,
Andrew Masse
 

Series6

Past President
Gold Level Sponsor
Bill,

Beautiful car Sir. (You gotta smile more.) Good luck with the project.

Is the dash aluminum? Looks great. I wish I had the ability to do one for my project.
 

Bill Blue

Platinum Level Sponsor
Bill,

Beautiful car Sir. (You gotta smile more.) Good luck with the project.

Is the dash aluminum? Looks great. I wish I had the ability to do one for my project.

Thanks. I found another photo of the car without me, I think I will substitute it. The dash is a Series II dash with some holes filled, others added and painted with HammerTone Silver. I like the color. It is not as gray as the original, but not nearly as bright as a lot of silvers.

I am going to try to work or re- sizing, but it is not going to be a picnic. I am not good with 'puters and I am running Ubuntu. Will probably recruit my son to help.

Bill
 

Chuck Ingram

Donation Time
Hi Bill
Re 11.5 inch rotors in a 14 inch wheel.
I don't know about that.I'm using 11 inch Ford and calper to match and clearance to the caliper is very close.Maybe 3/16th of an inch.
 

Bill Blue

Platinum Level Sponsor
Hi Bill
Re 11.5 inch rotors in a 14 inch wheel.
I don't know about that.I'm using 11 inch Ford and caliper to match and clearance to the caliper is very close.Maybe 3/16th of an inch.

Chuck, I never said there would be a lot of room! I have maybe 1/8" clearance. But as Jose said a few years ago, clearance is clearance. That is with alloy rims. Steel would increase that considerably.

But I was wrong, anyway. Just checked, the alternate Grand Prix rotor is 11 1/4". I think you would agree that a 3/4" larger rotor will fit within a I" larger wheel. If you don't mind, I'm going to correct my post.

Bill
 

bashby

Donation Time
It will be wheel dependant too , I have 12.2" Wilwood rotors with 4-piston calipers inside 15" Minilites with 7/8" rotor-wheel clearance and ~3/8" caliper-wheel clearance; if this assists the number calculations.
 

Andrew

SAOCA Web/Graphics Service
Donation Time
Hi Bill,

You can always fire off the images you need resized to me and I will do the work and email them back to you.

Regards,
Andrew
 

SDuncan

Donation Time
Bill,

On the photo of your dash/steering column, there is a little red switch on the right side of the column. What is it for?
 

Bill Blue

Platinum Level Sponsor
Bill,

On the photo of your dash/steering column, there is a little red switch on the right side of the column. What is it for?

4 way flasher. I wired the car with the EZ kit and decided why not? All the stuff to do it with was in the kit, minus the switch. The switch is set in an overdrive column blank.

Bill
 

Bill Blue

Platinum Level Sponsor
Hi Bill,

You can always fire off the images you need resized to me and I will do the work and email them back to you.

Regards,
Andrew

Thanks for the offer, but I am going to try to work through this with my son. Gotta learn sometime.

Bill
 

Bill Blue

Platinum Level Sponsor
This is the cut out I made in the crossmember in order to gain clearance for the oil pump.
IMG_1071.jpg

At this point I tried to install the engine, but I ran into severe starter/steering arm issues. That lead to a couple of months of farting around, rebuilding the front end. While the crossmember was out of the car, I welded in the reinforcement.

Here it is with a Q&D paint job.
IMG_1072.jpg

The box material is 11 gauge. You can also see a strap below the cut out area. It is 1/8". I think that should be strong enough, only time will tell.

The only reasonable solution was to have another go at building up the starter mount and cranking it around a bit more. This time I had some 1/2" aluminum welded in. The first time I used 3/8". Here is the nose of the starter, still warm from the welder.
IMG_1202.jpg

Looks pretty much like a blob. This job is getting more economical as I go along. This welding job cost about 1/2 the first one. Same welder, too.

Here it is on the milling machine. The flats have been milled and it is ready for the mounting holes to be drilled. The stub stuck into the pinion bearing is used as the hole centerline and mounting surface reference.
IMG_1203.jpg


Bill
 

Bill Blue

Platinum Level Sponsor
Here is the starter nose off the mill. Gives you some idea how much it is cranked around. This about as far as I can go, the mounting bolt is rather long starts to interfere.
IMG_1201.jpg


Starter bolted onto the engine. At this point we gave it a shot of juice to see if it worked. Two shots, really. Both had a successful pinion engagement and cranked the engine. Maybe two revs total. But it did work and sounded good.
IMG_1206.jpg


Engine reinstalled with starter. Clearance is excellent. About 3/16" top and bottom when the arms are at full lock. right or left.
IMG_1208.jpg

This thing is going to work!

Bill
 

bobw

Donation Time
I am going to try to work or re- sizing, but it is not going to be a picnic. I am not good with 'puters and I am running Ubuntu. Will probably recruit my son to help.

Bill

Sorry Bill, I just assumed you were on a windows system like 90% of the world. An easy way to do it is run this command in a terminal:

convert -size 640x480 $1.jpg -resize 640x480 +profile "*" $1_6.jpg

Oops, the command above will work as I described if you make it an executable script. To use it on the command line, do it this way:

convert -size 640x480 picture_filename.jpg -resize 640x480 +profile "*" new_picture_filename.jpg

(everything on one line) and you will get a 640X480 image with the same name with _6 appended. If you want a different size like 1024X768, put that in both places in the command. change the _6 to whatever you want appended to the file name. It uses Image Magic for the conversion. If you don't happen to have Image Magic installed (it probably is), use Synaptic to install it.

Next step is put the command in a file and make it executable. I have it in a file called isize, so if I type
isize picturename.jpg, I get a resized picture called picturename_6.jpg.

Bob W.
 

Bill Blue

Platinum Level Sponsor
Resizing turn out to be very simple. The photos are stored on Photobucket.com. While messing around trying to send myself a copy of a photo, my curser went over the top of an enlarged picture. A photo control panel came on, among the available options was "Resize". It turns out that I can resize the photos and store them under under the old address, using only about two clicks of the mouse. So that is what I did. It worked fine except for the photo of the rear of the axle. For some reason, it does not respond. I think maybe I'll delete the current image addy and paste in the current addy. Might have an effect, dunno.

Thanks for the concern and encouragement.

Bill
 
Top