• Welcome to the new SAOCA website. Already a member? Simply click Log In/Sign Up up and to the right and use your same username and password from the old site. If you've forgotten your password, please send an email to membership@sunbeamalpine.org for assistance.

    If you're new here, click Log In/Sign Up and enter your information. We'll approve your account as quickly as possible, typically in about 24 hours. If it takes longer, you were probably caught in our spam/scam filter.

    Enjoy.

Removing Door Hinge Screws

KenDemp

Donation Time
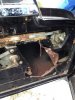
Since it's still too cold to do much outside work, I was going to remove my driver side door and bring it inside to do some work on it. Turns out the screws are stuck fast. I was going to get something like this :

http://www.vesseltools.com/hand-too...p2*150/flypage.tpl.html?keyword=impact+driver

Anyone have any favorites in that category? Any tips for removing the door? and most important, is there anything I might be missing, like the door having left hand threads or something like that?

Thanks

Ken
 

SumBeans

Donation Time
Using a large Phillips drive screwdriver with a square or hex on the handle allows for a wrench to be used for extra leverage.

Often an acetylene heat source is required to release the rust of the threads. Propane is often not enough. Heat the screws red and let them cool down before turning so as not to twist the heads off.

The threads are RH fine thread and have a very good grip especially when rusted.

If you plan to re-use the same hinges, it is recommended to drill a 1/8th hole through the hinge and door post to help save time in the re-alignment process:cool:
 

tom o

Donation Time
i used a half in. drive impact gun with a 3/8 adapter, a 8 in. extension and a 3/8 drive phillips screw driver bit. I set my air pressure to 100 psi and they all came out with ease. I stripped off 2 with a screw driver and wrench before I went to this route.


b395018322 and real rusty
 

DanR

Diamond Level Sponsor
I had some really tough to remove screws in my doors and tried several times using a large Phillips screw driver. Then I remembered to tap rather hard on the handle while turning with my other hand. They all broke loose then.

Air hammer, impact gun, etc... Seems the hammer on the end of the screw driver works also.
 

George Coleman

Gold Level Sponsor
If you can before you start to remove them use some kind of pentra. oil on the screws and put some on the backside if you can get to them as well. I used a impact screw drive as well on my projects, still had to drill out a few in the end that works well too!:cool: good luck
 

socorob

Donation Time
I had to drill half of them out on my parts car when trying to remove them. Impact and penetrating oil did nothing. I was even able to spray the backsides of the screws easily thru rust holes. Just make sure to put some anti seize on them when reinstalling to help a future sunbeamer out It would have been better if they used shorter screws. All mine turned a turn or so before they got to the part that was sticking into the cavity. The threads in there rusted and that's what stopped mine.
 

agmason54

Donation Time
Ken,
I bought an impact driver at AutoZone for around ten bucks. It is very handy even on small screws....
Al
 

KenDemp

Donation Time
thanks for all the helpful replies. I will hit the store tomorrow and see if I can get an impact driver. Would be nice to get a phillips adaptor for the impact gun too. I did hit it with aero kroil while I was working on it today, and I did give the screws a few pretty enthusiastic whacks with the regular screw driver, but to no avail.

Looks like a PO tried to remove the screws as the slots are chewed up a little bit, but I was able to get good purchase on all the screw heads... just couldn't move them.

See the pic to see what else a PO did to the door. I couldn't figure out why it was butchered like that. At first I thought it was to try to fix a couple of dents, to get access to the inside of the door skin to try to hammer them out. But the location of the butchery is not really in the right place, and the dent "repairs" look like he jabbed something pointy into the dents, and he didnt need good access to do it that way. I think was done to mount a speaker. There are some small holes around the hole as if someone sunk some screws there.
 

Attachments

  • IMG_0068.jpg
    IMG_0068.jpg
    31.8 KB · Views: 46
Last edited:

SumBeans

Donation Time
Heat before you Beat !

If you have access to heat, it breaks and makes the rust bond easier to work with. Try a concentrated intense heat to the head and let it cool down to break the rust bond before removal.
I have had the best luck heating them up in advance.
Hitting the screws with the impact screwdriver only turns the fastener about a 1/4 turn. With the screws being NF and long that equates to a lot of hits and possible damage to the Phillips drive if the rust bond is still on the threads.
Your mileage will vary depending on the previous owners approach.
 

DanR

Diamond Level Sponsor
As an after thought to the screwed problem.... The screws being used on the door hinges (Original and replacement) are a bit longer than need to be.

Remember George mentioned about spraying an oil on the back side of the hinge?

I measured my "replacements" and cut them so that they would not protrude bu just a few threads beyond the inside area of where the hinges are fastened.

Maybe not necessary but I (or the next owner) should never have a problem removing them in the future.
 

bashby

Donation Time
I tried to drill my hinge plates to assist with realignment, the steel is hard! slow speed and cutting fluid, still broke the drill bits.
As for the screw removal I soaked then threads and screws, got my #3 phillips with a hex shank, a 10" adjustable wrench and leaned into them pretty hard to get them off my SV. Then, chased the threads and replaced the phillips screws with black oxide hex drives ("Allen" heads -McMaster Carr has them if your local hardware store does not, I am fortunate that we have McGuckin Hardware here).
 

Jay Laifman

Donation Time
My suggestion is that if you don't NEED to take them off, DON'T.

It is a huge pain to get them back on, aligned again, and without chipping any paint.

The idea above about drilling the holes is great. But, still, if not truly, absolutely necessary, leave well enough alone.

Also, as I've pointed out before, when the factory first mounted these, and spent the time to adjust each one to fit each door, they did it BEFORE the car was painted. So there was no primer or paint between the hinges and the body on both sides. I learned this the hard way. When I put mine back together, the extra thickness created by all that paint and primer moved the door back enough that the rear of the door would not and could not close and work properly. That's at least four layers of paint and primer that later needs to be taken off (and no fun when taking paint and primer off from the body side).
 

65beam

Donation Time
screws

one thing no one has mentioned is that the door screw heads have serrations on the head that makes them basicly a lock screw. rootes used internal tooth lock washers and the same pricipal is made into these screws. this makes them very hard to loosen. it's almost impossible for the penetrating oil to get to what is preventing the screw from coming loose since the heads are beveled as are the hinges.
 

PROCRAFT

Donation Time
screws

Bill, great idea on the allen head screws however black oxide is not a deterent to rust, we cad plated them after removing and assembled with never seize, if the doors are alined drilling an 1/8" thru the hinge and the back plate will save the agro later its easy with a good bit.
 
Top