• Welcome to the new SAOCA website. Already a member? Simply click Log In/Sign Up up and to the right and use your same username and password from the old site. If you've forgotten your password, please send an email to membership@sunbeamalpine.org for assistance.

    If you're new here, click Log In/Sign Up and enter your information. We'll approve your account as quickly as possible, typically in about 24 hours. If it takes longer, you were probably caught in our spam/scam filter.

    Enjoy.

Sunbeam 2000 build

belmateo

Gold Level Sponsor
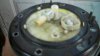
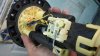
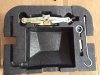
Forgot to add the wheel lock. I was able to get the dashboard, body, and rear wiring harnesses from the Miata as well as the ECU for the PRHT and the switch assembly for lowering/rasing the top. Will start to unwrap to isolate what I need and eliminate the rest. Good wet weather work for me. HA!
 

Attachments

  • IMG_20190124_153222.jpg
    IMG_20190124_153222.jpg
    164.5 KB · Views: 49

belmateo

Gold Level Sponsor
Yes, it started out like the one in the pic below (Not mine, took it from the net). What needed to be done was to cut it down, glue the pieces together and shave the bottom of it to fit inside the spare wheel. I also added a hole for the wheel lock that is always never where you think it is!
 

Attachments

  • S2000 tool kit.jpg
    S2000 tool kit.jpg
    14.1 KB · Views: 40

belmateo

Gold Level Sponsor
Well, one step forward two steps back! I put fuel in all the tanks and did not see any leaks. When I tried to start the car there was a fuel smell, sure enough there is a leak in the main tank! Out with the rear subrame and out with the tank. What was found is some spots on the bottom of the tank under the factory undercoating that look like the welder "sparked" on them. Scraped off all the undercoating and covered the holes with JB Weld. I also found the epoxy that I used to seal the fuel pump mount did not hold up to the fuel. Cut the top of the tank and doing over again, will also seal it good with some Por-15™ that is left over from the saddle tanks. Oh what fun.
 

belmateo

Gold Level Sponsor
Tried to finish up welding the gas tank today and ran out of welding wire, LOL
Of course tomorrow is a holiday, go figure.
 

DanR

Diamond Level Sponsor
Well whaty do you expect? It is either the wire or the GAS:) AND WHEN THE SUPPLIER WILL BE CLOSED NEXT DAY or two!!!
 

belmateo

Gold Level Sponsor
Good news today, I found a couple of 20% off coupons for welding wire from Harbor Freight. They ended up costing me a little over $22 each compared to Home Depot that wanted $45 each.
 

belmateo

Gold Level Sponsor
Here is one of the wiring harnesses that I need to break down and eliminate what is not needed.
 

Attachments

  • IMG_20190207_141352.jpg
    IMG_20190207_141352.jpg
    128.7 KB · Views: 29

belmateo

Gold Level Sponsor
The main gas tank has been a major PITA. I broke the original nipple from the fuel pump housing and ordered a replacement and broke that one too. They are made of plastic, so I have no choice but to make it out of metal. Just ordered two brass 90 degree street elbows for the supply and return lines. Trying to come up with a way to keep fuel around the pump for cooling purposes just like the factory did. Testing some adhesives now so I can decide which one to use. Choices are limited because it will be exposed to fuel.
 

belmateo

Gold Level Sponsor
I received a few brass 90 degree 3/8" fittings. They are a little too large so I have some 1/4" arriving monday. It looks like it will work one way or another.
 

belmateo

Gold Level Sponsor
I have not posted in sometime due to a pinched nerve in my neck that was painful from my neck to my thumb (including everything in between). Finally got a cortisone shot after trying acupuncture/cupping/massage. It worked right away, oh what a relief. In the meantime, have been getting the parts together to complete the fuel pump/Sending unit assembly so I can get the tank done and back in the car. While that is going on cement work is being done at the house while we have a break in the weather.
 

belmateo

Gold Level Sponsor
Ended up with 1/4" brass street elbows for the fuel pump/sending unit. The pressure side is threaded into the plastic housing and the return line will dump into the fuel tank sump. Waiting for the glue to dry and check it for leaks (hopefully lack of).
 

belmateo

Gold Level Sponsor
I have not posted anything for some time now due to the Honey Do list needed attention. We poured a footing at the property line for a new fence, just over 90 feet. Metal posts were used and all redwood boards. Here are two pictures from each side of the fence. As you can see, there are no visible posts! Amazing, isn't it? My tools were also organized during this period as well.
 

Attachments

  • 100_4090.JPG
    100_4090.JPG
    324.3 KB · Views: 40
  • 100_4091.JPG
    100_4091.JPG
    558.5 KB · Views: 40

belmateo

Gold Level Sponsor
Since having the new fence done I had to have sugery on my left hand (carpal tunnell) that was done on Thursday. Ice, Naprozen and keep it elevated to get the swelling done.
 

Barry

Diamond Level Sponsor
Since having the new fence done I had to have sugery on my left hand (carpal tunnell) that was done on Thursday. Ice, Naprozen and keep it elevated to get the swelling done.


Had it done on my right wrist 8 weeks ago. Everything is pretty much back to normal, but banging the heel of the hand on something is not a good idea.
 

belmateo

Gold Level Sponsor
You are absolutely right, the palm is very sensitive and takes a long time to heal. I hope you are recovering well by now.
 

belmateo

Gold Level Sponsor
Slowly getting back into the build after my hand surgery. Got the main tank finally sealed with a modified factory fuel pump pickup and sending unit. Had to stop and search for some Fuel injected fuel hose and undercoating spray. Will be working on that and making the final exhaust, after that the rear subframe can be mounted.
 

belmateo

Gold Level Sponsor
Here are some pictures of the broken fuel pomp mount and my attempt to save it.
 

Attachments

  • 100_4092.JPG
    100_4092.JPG
    119.2 KB · Views: 43
  • 100_4093.JPG
    100_4093.JPG
    160.4 KB · Views: 42
  • 100_4094.JPG
    100_4094.JPG
    162.4 KB · Views: 41
Top