• Welcome to the new SAOCA website. Already a member? Simply click Log In/Sign Up up and to the right and use your same username and password from the old site. If you've forgotten your password, please send an email to membership@sunbeamalpine.org for assistance.

    If you're new here, click Log In/Sign Up and enter your information. We'll approve your account as quickly as possible, typically in about 24 hours. If it takes longer, you were probably caught in our spam/scam filter.

    Enjoy.

SV Interior from SS Installation

PaulK

Gold Level Sponsor
First let me introduce myself with some background information.
My 67 SV was purchased by me in approximately 1989, yep that was eons ago. The car had been owned by a guy in Minneapolis MN and later was moved to Kansas, therefore was a salt victim. The interior was also a victim of neglect and duck tape. So my questions on the interior installation come from a guy that has never been around an Alpine that has a proper interior still intact.

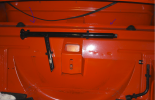
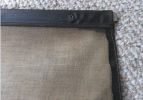
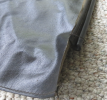
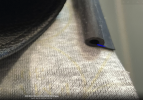
My Alpine is in my garage with what I think is the first piece layed out on the trunk lid, the curtain or hammock that separates trunk from cockpit. This piece has a rubber bead along one edge and a hem Sewn on the other side. 664F2BE8-17BE-4132-9F21-2F895D767E67.jpeg
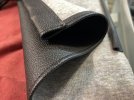
My first question, which edge goes to what part of the opening?

Added to post.
Searching further I found pictures from Mike Hartman’s post showing where the edge with the hem attaches to the flange in the upper part of the trunk.
Still haven’t found anything on the edge with the rubber bulb seal.

Paulk
67 SV restoration
 
Last edited:

hartmandm

Moderator
Diamond Level Sponsor
Hi Paul,

I have a photo album in the gallery that might help. https://forum.sunbeamalpine.org/index.php?media/albums/mike-hartmans-series-v-restoration.12/

Some trunk curtain pictures are on this page: https://forum.sunbeamalpine.org/index.php?media/albums/mike-hartmans-series-v-restoration.12/page-7

The rubber piece on the bottom of the trunk curtain goes onto a metal ridge/lip that sits on top of the vertical section where the spare tire mounts.

1681666886962.png


Note: The top section of the trunk curtain, which gets riveted in place, should have a metal piece (it was two equal length pieces on my SV) that slides through the sewn hem. You can see it peeking out the end in this photo.

1681667197596.png

Mike
 
Last edited:

PaulK

Gold Level Sponsor
Mike, your photo gallery is a fantastic resource for the what’s, where and how a Sunbeam is put together and where things go. I ran across your collection of photos and had found the picture of the curtain with the metal strip in the hem and the one showing it riveted to the flange in the trunk. What method is used to fasten the other end to the flange at the shock mount?, the rubber bulb seal has me a little confused.

Also, I found another tidbit among your photos. That is the oil pressure gauge line attachment at the engine, and as soon as I saw your picture labeled Distributor, I saw the rigid line connecting the hose to the fitting in the block.

There are other very nice information pieces in there that I picked up on also. Thank you for taking the time to post all those pictures in the gallery, I hope others are able to glean as much information as I have from these pictures.
 

hartmandm

Moderator
Diamond Level Sponsor
The lower end of the curtain with the rubber piece - you just press the rubber onto the metal lip. Below is a picture of my original trunk curtain showing the rubber piece and its opening. Hopefully your curtain from SS has the same setup. I took the picture you posted and I marked a line in blue where I expect the rubber piece will open up to allow it to fit onto the metal lip.

Mike

1681674554834.png

1681674849997.png
 

PaulK

Gold Level Sponsor
Well Mike I guess my 78 year old eyes were playing tricks on me, after you point that out mine is split as you stated. You are the greatest.

One more question, if I may. What direction does the big nut on the front of the crankshaft turn to loosen.
 
Top