DaisyPusher
Diamond Level Sponsor

Welcome to the new SAOCA website. Already a member? Simply click Log In/Sign Up up and to the right and use your same username and password from the old site. If you've forgotten your password, please send an email to membership@sunbeamalpine.org for assistance.
If you're new here, click Log In/Sign Up and enter your information. We'll approve your account as quickly as possible, typically in about 24 hours. If it takes longer, you were probably caught in our spam/scam filter.
Enjoy.
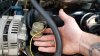
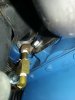
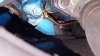
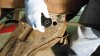
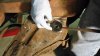
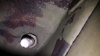
Is this the oil pressure sender? It connects to the bottom LH of the block and I believe it's leaking a bit. I still haven't been able to make time to get her on the lift to verify but has anyone else had this issue?