• Welcome to the new SAOCA website. Already a member? Simply click Log In/Sign Up up and to the right and use your same username and password from the old site. If you've forgotten your password, please send an email to membership@sunbeamalpine.org for assistance.

    If you're new here, click Log In/Sign Up and enter your information. We'll approve your account as quickly as possible, typically in about 24 hours. If it takes longer, you were probably caught in our spam/scam filter.

    Enjoy.

Sunbeam 2000 build

belmateo

Gold Level Sponsor
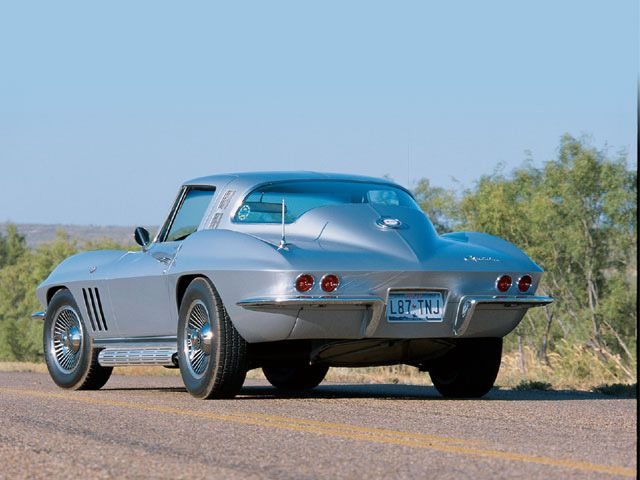
I would make the gap into a license plate mount.

Thanks John, and I want to publicly apologize to you for calling you Tony in our messages.
The original idea was to go with split bumpers which would actually be much easier then lengthening one. I have already put the plate below to cover up the spare tire well, so maybe a rear diffuser/apron underneath?
 

Toyanvil

Gold Level Sponsor
vemp_0605_06_z1965_corvette_stingrayrear_view.jpg
 

belmateo

Gold Level Sponsor
Do you mean the middle of the bumper like a Corvette or make it a one piece bumper and have the plate where it is in my picture?
 

DanR

Diamond Level Sponsor
I like the way you planned with the two piece but with the plate mounted between the two pieces similar to the Vette. Like toyanvil posted...
 

belmateo

Gold Level Sponsor
It has been quiet here because I had to have my appendix removed last week. also passed a stone. So much fun, NOT!
I have taken some of your ideas which I appreciate immensly and picked up some actual Corvette split bumpers that I will fit to see how it looks. Initially it appears that the exhaust needs to be rerouted as they will interfere with the down part of the bumpers. Slowly getting back to it. Boy was it painful!
 

buckalpine3

Donation Time
It has been quiet here because I had to have my appendix removed last week. also passed a stone. So much fun, NOT!
I have taken some of your ideas which I appreciate immensly and picked up some actual Corvette split bumpers that I will fit to see how it looks. Initially it appears that the exhaust needs to be rerouted as they will interfere with the down part of the bumpers. Slowly getting back to it. Boy was it painful!
I would imagine the appy just about as painful as buying Corvette parts.
 

MikeH

Diamond Level Sponsor
I had mine removed at 18, when first in the US Navy. Part of the recovery and therapy consisted of holding field day (cleaning, for you civilians) in the hospital ward. Oh the fun of swinging a swab with stitches in your side.
 
Last edited:

Gordon Holsinger

Diamond Level Sponsor
It has been quiet here because I had to have my appendix removed last week. also passed a stone. So much fun, NOT!
I have taken some of your ideas which I appreciate immensly and picked up some actual Corvette split bumpers that I will fit to see how it looks. Initially it appears that the exhaust needs to be rerouted as they will interfere with the down part of the bumpers. Slowly getting back to it. Boy was it painful!
Take it easy abdominal surgery is painful I had 4 hernias repaired last october
 

belmateo

Gold Level Sponsor
I would imagine the appy just about as painful as buying Corvette parts.
Ha!
I was able to get a pair of rear bumpers locally from a Corvette specialist. The emergency procedure I had is a called a Laparoscopy. Four small incisions and no stitches (Super glue). Getting better each day. Today I was able to get the fabricated seat belt mounts finished and installed both belts. Just need to find the small angled piece that the belt attaches to at the roll bar. Funny thing, I was taking it easy by slowly organizing things and CRS kicked in when it came to finding them. By the way, one of the Superglue pieces fell off today with no concerns. Thanks you for your kind thoughts.
 

Gordon Holsinger

Diamond Level Sponsor
I had mine removed at 18, when first in the US Navy. Part of the recovery and therapy consisted of holding field day (cleaning, for you civilians) in the hospital ward. Oh the fun of swinging a swab with stitches in you side.
Field day many times USMC veteran
 

belmateo

Gold Level Sponsor
Field day many times USMC veteran
Thanks for your service Gordon and Mike H.
A bit of progress today, got the inner fender liners installed and working on the grill and bumper attachements. Currently getting the sheet metal formed on the passenger side. It is going to look NICE!
 

belmateo

Gold Level Sponsor
Not bad at all, like you it was expected to be much more. Been working on the front sheet metal and grill above and below the bumper. Had to make bumper mounts (done) sheet metal above and behind the bumper (done, just needs to be attached). The fender liner that was received for the drivers side had been cut around the wheel lip area, ordered a new one and should arrive next week. The Valance pan below the bumper is not going to resemble a stock Alpine. I am going after a more aggressive ground effect air dam look. The grill will be a stainless steel mesh with everything behind it blacked out. There will be lots of fresh air hitting the radiator. On a side note, finally located the seat belt runners and got them welded on, painted and belts attached. So the interior is essentially done, will give it a good cleaning when the car is done.
 

belmateo

Gold Level Sponsor
I have been working on the front end sheet metal and it is coming along nicely. The ridge or peak on top of the front fenders has been adjusted to make a straight line to the point at the rear of the fenders. Now I am pondering adding cooling ducts to the front brakes, mixed emotions for sure. If I go with bigger calipers down the road, friction and heat will be increased so that is one thought. I may find that the stock brakes work just fine as they are. Decisions, decisions.......
 

belmateo

Gold Level Sponsor
Went ahead and pulled the trigger on front brake ducting, ordered the parts last night. Clearance is an issue so I got these coming to take up little room.
brake ducts.jpg
 

belmateo

Gold Level Sponsor
I also ordered some stainless steel braided brake lines. Nobody likes a spongy pedal when it comes to brakes. The only thing left to fabricate is the air inlet for the ducting.
 

Gordon Holsinger

Diamond Level Sponsor
I also ordered some stainless steel braided brake lines. Nobody likes a spongy pedal when it comes to brakes. The only thing left to fabricate is the air inlet for the ducting.
I want to use stainless braded brake lines on my Alpine they don’t expand and I like a firm pedal. Who did you order them from?
 

belmateo

Gold Level Sponsor
I ended up getting them ordered from Summitracing.com
The link is here:
https://www.summitracing.com/parts/rus-684490/overview/year/2003/make/honda/model/s2000
When this project first started, I had a hard time finding good brake lines for the Alpine/Tiger. All that could be gotten at that time were new rubber ones from Brazil I think. Good quality, good price, slow shipping at best, unfortunately after that purchase my spam emails went through the roof. Got that under control, but what a PITA.
For the Sunbeam Alpine/Tiger steel braided brake lines you might look into these:

https://www.ebay.com/itm/3-Piece-St...009985?hash=item5206d60e81:g:PjYAAOSwPyZamvE0

There may be others out there that I am not aware of. Possibly other members on here can chime in on this if they have found something better. I will also be sure to upgrade all the brake fluid with LMA high heat fluid.
 
Top