beijing_ken
Donation Time
Hi All,
I am in the process of re-installing my windshield and the triangular side windows in the doors and hoping to get some advice/tips on setting them set up so that they align properly.
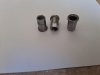
I do have the two adjusting nuts for the windshield frame put I am not 100% sure how they work as the fall through the stud holes. I realize that they thread onto the studs, but if they don't sit on the body, then how do they work ?
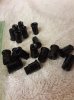
In addition, what are people using as between the drip molding and the piece of molding riveted to the windshield frame ? Mine has some very old, dry and black sealer.
Thanks in advance.
Ken
PS - it is a series IV if that makes a difference.
I am in the process of re-installing my windshield and the triangular side windows in the doors and hoping to get some advice/tips on setting them set up so that they align properly.
I do have the two adjusting nuts for the windshield frame put I am not 100% sure how they work as the fall through the stud holes. I realize that they thread onto the studs, but if they don't sit on the body, then how do they work ?
In addition, what are people using as between the drip molding and the piece of molding riveted to the windshield frame ? Mine has some very old, dry and black sealer.
Thanks in advance.
Ken
PS - it is a series IV if that makes a difference.