• Welcome to the new SAOCA website. Already a member? Simply click Log In/Sign Up up and to the right and use your same username and password from the old site. If you've forgotten your password, please send an email to membership@sunbeamalpine.org for assistance.

    If you're new here, click Log In/Sign Up and enter your information. We'll approve your account as quickly as possible, typically in about 24 hours. If it takes longer, you were probably caught in our spam/scam filter.

    Enjoy.

Hub Pulling.................too easy.

Duke

Donation Time
So my right rear wheel bearing is making a hell of a noise. This means, I need to separate the hubs from the axles. I have been reading the horror stories for some time now about this task. With several weeks prep, I dug into it last week. I of course planned on replacing both wheel bearings while I was doing it. I used info from Dan Walter's perfect hub puller to make mine.

006-1.jpg


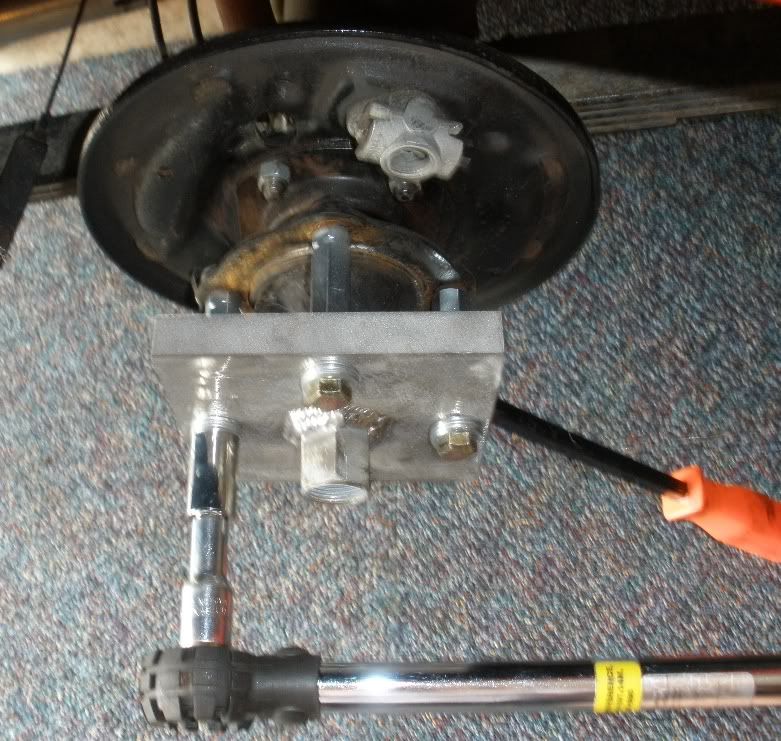
Just plate steel with four holes and the fitting for the slide-hammer welded
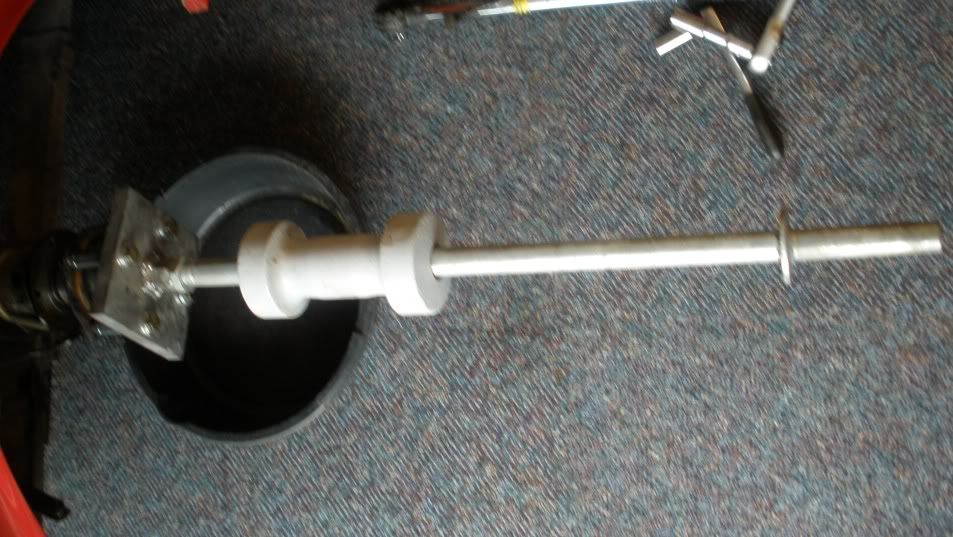
to the center. That with some bolts, washers and coupling nuts. The hubs
came off easily requiring 40 ft/lbs on one side and 50 ft/lbs on the other.

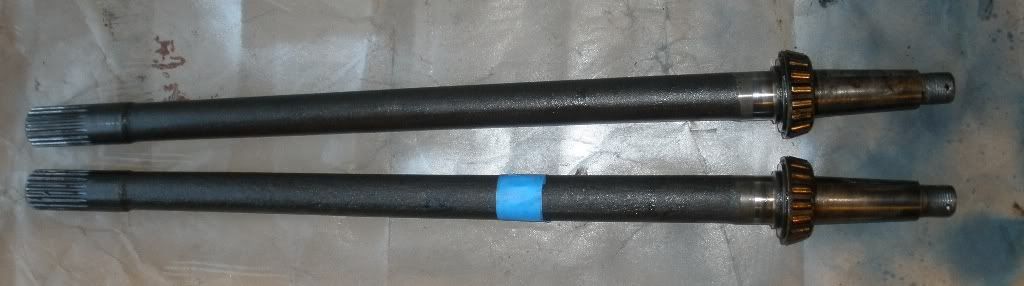
I then used the MONGO slide-hammer to pop the axles out.

009.jpg


010.jpg


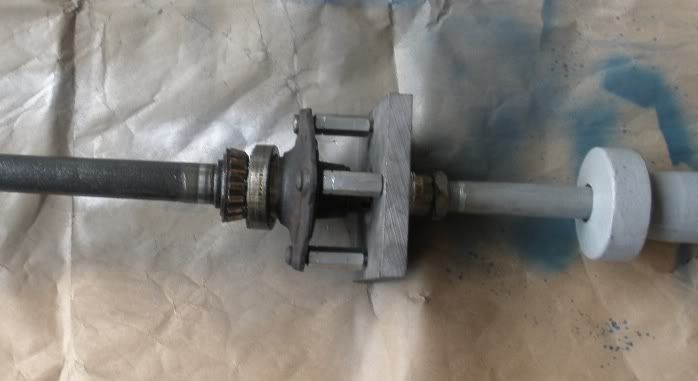
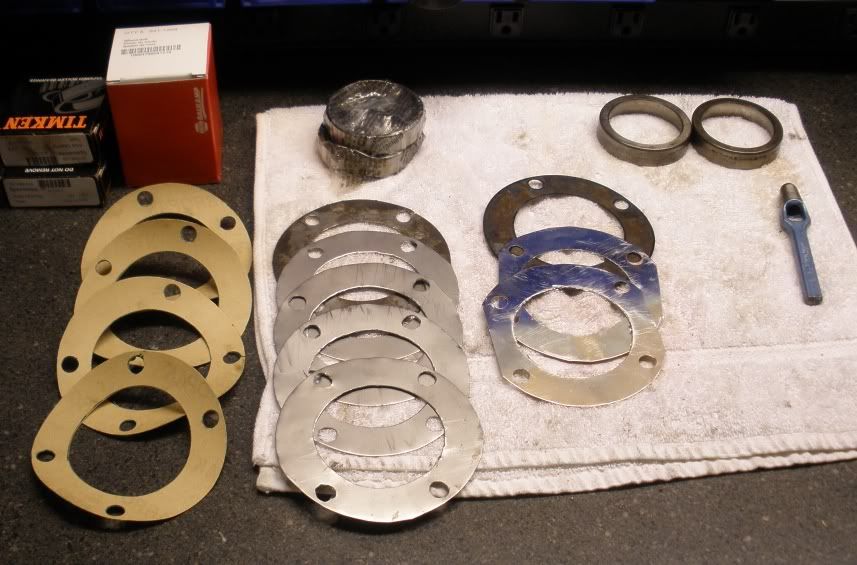
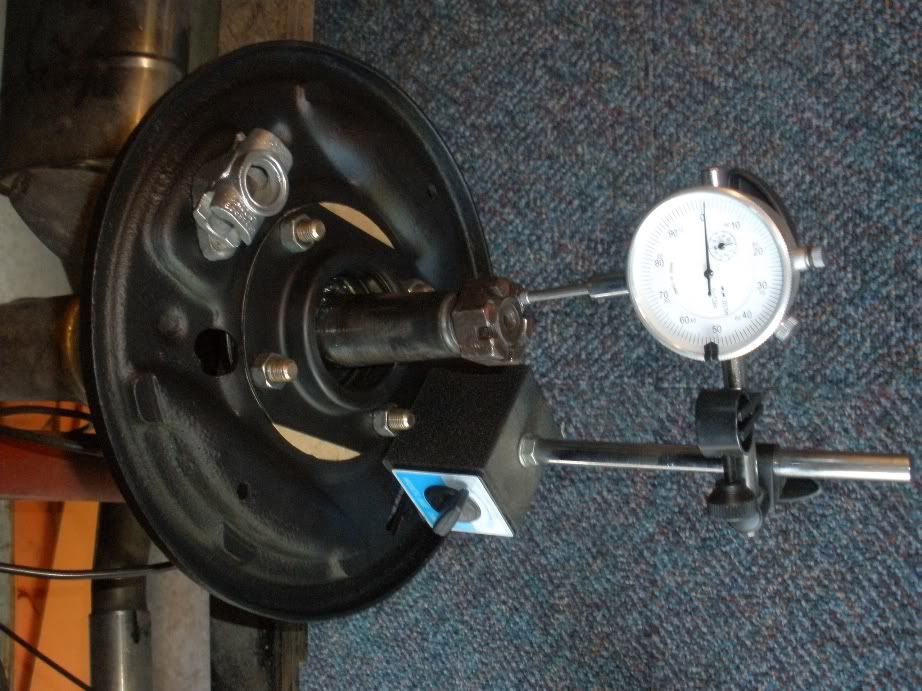
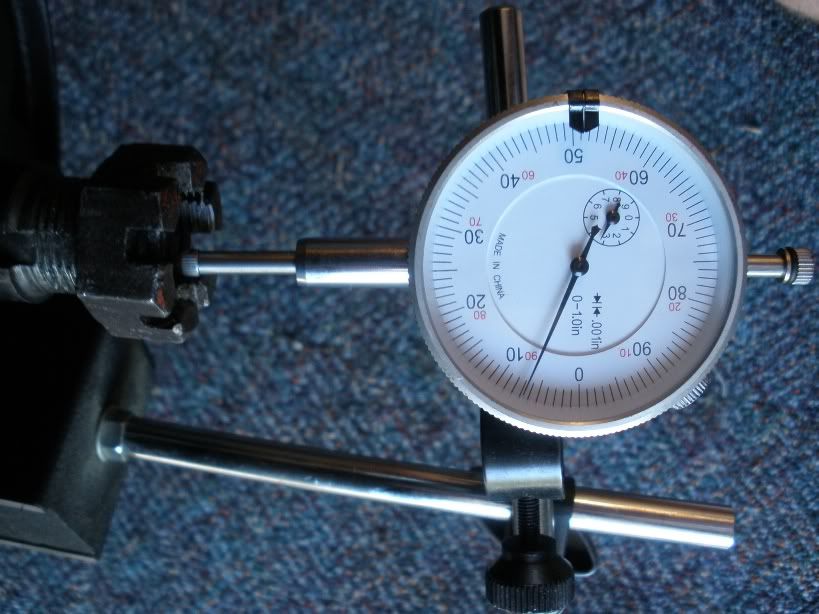
I checked for end play before I pulled the axles and there was 0 on both
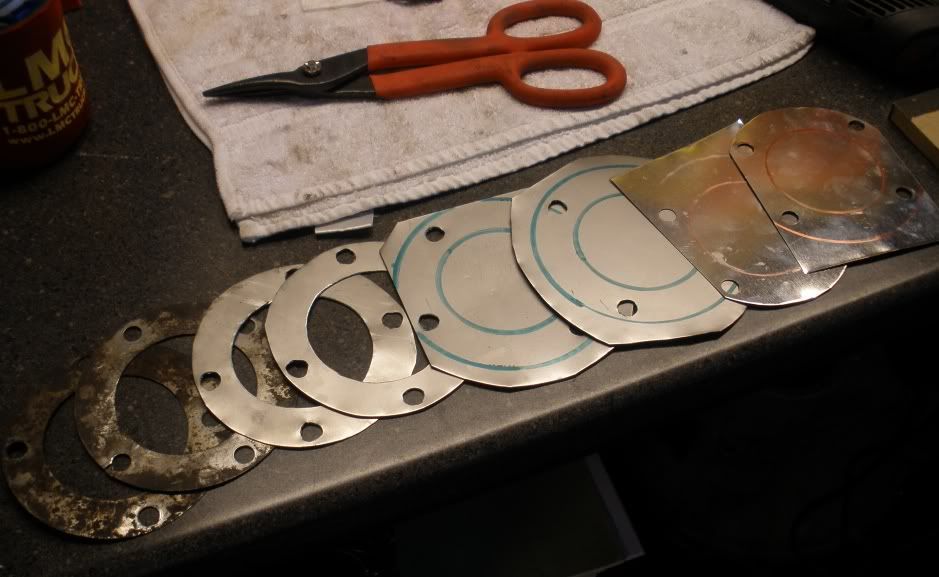
sides. There was a .030 shim on one side and a .010 on the other. So, I
needed shims. There are no shims available in Leavenworth, KS so I made
some.

012.jpg
 

Duke

Donation Time
014.jpg


I bought some .030 steel and .010 tin at the locale hardware store.

I also had to make the paper gaskets which was quite easy after cutting the metal ones.

Have some parts painting to do today and then Monday I will have the old
bearing removed and the new one pressed on.

013.jpg


Job is now complete. I ended up with .005 on the left and .007 end play on the right. The car is the quietest it has ever been with no bearing noise. I can even hear the drum brakes being applied now.

I would be more than happy to lend the tools and extra spacers to anyone that needs to do this job. The slide hammer might be a little pricey with postage though.
 

bluoval

Donation Time
now you tell me..

Duke Thank you for the post.. I had to replace the Wheel studs and tried off and on for the better part Of 2 months in an effort to pull the Hubs off so i could get the old studs out and replace them...without a hub puller way over the horizon, and trying the local parts store tried the standard hub puller without sucess. I got so discouraged. I picked up the die grinder and cut out a notch in the plate so I could then slide the old studs out and the new ones in.. your puller would have been a dream come true. But what made it even more dificult was dumb me tried to remove the hub with the housing out of the car and on the gar floor. Reguards Earl Bluoval
 

sunbby

Past SAOCA President
Donation Time
Duke, nice job. Is this based on the fabricated hub puller that bolts to the hub and then has 4 more bolts used to apply the pressure, described on TigersUnited? And what are the hex spacers for, do they do anything?
 

Duke

Donation Time
Todd, yes it is based on that puller.

The "hex spacers" are coupling nuts that screw on to the wheel studs. They then sit below the level of the end of the axle. Four bolts are then threaded through the plate steel and into the coupling nuts. The plate steel then is screwed against the end of the axle and castle nut that has been loosened to where it is flush with the axle end. This leaves about 1/4" that the hub can move towards the plate when It come loose.

Then each bolt is tightened evenly with a torque wrench until the hub simple pops loose. The plate is then removed, castle nut removed and the hub slides right off.

Earl,

You can borrow the tool anytime you decide to remove your hubs again. I replace all the studs when I had the hubs off.
 

bluoval

Donation Time
hub puller

Duke Thank you for the offer.I now have the studs in and think that the slot in the plate will cause no harm. We will see.. Hows that new power plant coming along.. When do you plan to do the swap?? Earl bluoval
 

Duke

Donation Time
Hows that new power plant coming along.. When do you plan to do the swap?? Earl bluoval

Sitting on a stand in the garage. Part of the negotiations to buy it was that I would not install it until next year. I am doing other things to get the car ready. Looking to improve the brakes, reinforce the area around the leaf spring mounts and getting the other parts I will need.
 

sunbby

Past SAOCA President
Donation Time
The "hex spacers" are coupling nuts that screw on to the wheel studs. They then sit below the level of the end of the axle. Four bolts are then threaded through the plate steel and into the coupling nuts. The plate steel then is screwed against the end of the axle and castle nut that has been loosened to where it is flush with the axle end. This leaves about 1/4" that the hub can move towards the plate when It come loose.

Yes, of course... I was stuck thinking about my wire wheel hubs; no studs, just threaded holes for the bolts that hold the brake drum. So I was thinking the "pulling" bolts went all the way to the hub and the couplers weren't really doing anything. Makes sense now, thanks.

Did you make it yourself? Are the studs and pulling bolts 7/16" or 1/2" and did you find a threaded hex coupler or did you have to tap the threads appropriately?
 

Duke

Donation Time
Did you make it yourself? Are the studs and pulling bolts 7/16" or 1/2" and did you find a threaded hex coupler or did you have to tap the threads appropriately?


I had a local business fabricate it for me. Studs and bolts are 7/16-20 (fine thread). I ordered the 7/16-20 coupling nuts from McMaster Carr. I love that company. I found 7/16 coupling nuts localy (TSC, ACE) but they were -14.
 

Duke

Donation Time
A few more pictures -

002-4.jpg

Dial set up for end play measurement.

006-2.jpg

Manual calls for .006-.008 in end play. How is that for about perfect?

009-1.jpg

Painted and beautified, ready for some abuse.
 
Top