• Welcome to the new SAOCA website. Already a member? Simply click Log In/Sign Up up and to the right and use your same username and password from the old site. If you've forgotten your password, please send an email to membership@sunbeamalpine.org for assistance.

    If you're new here, click Log In/Sign Up and enter your information. We'll approve your account as quickly as possible, typically in about 24 hours. If it takes longer, you were probably caught in our spam/scam filter.

    Enjoy.

Head Gaskets and the Churchill Special Spanner

JConstable

Donation Time
All,

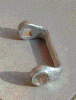
In an effort to avoid (or at least delay) the inevitable engine rebuild, as a logical first step in resolving low compression pressures and the leaking of coolant (likely due to cylinder pressure) is the replacement of the head gasket. In reading the WSM.145 it appears to be relatively approachable in all aspects except the re-tightening of the cylinder head bolts. The manual indicates that once the head is in position and the rocker clearances have been set with the engine hot, it is allowed to cool and then the bolts are released and re-tightened to the appropriate torque - a task aided by the Churchill Special Spanner as it can fit around the rocker gear.

What is this? Is this a required tool? it is not listed in the special tool section of the WSM.145. Are there other less special tools with which I can accomplish this task?

Apologies if this question is simplistic as it may be resolved once I actually get my elbows into the engine

John:confused:
 

alpine_64

Donation Time
John,

You dont need the special tool... but... You may end up rebuilding the head anyway.. skim, vavlves, seats, rockers etc... if there is wear in the bores.. you may aswell just do the whole thing now.. as fixing 1 issue will just put pressure on other things. Asses the engine and see if it all needs doing.. otherwise you will be repeating jobs again in the near future.

Just my .02c
 

lemansvk

Donation Time
John,

Your compression improved when you added oil to the cylinders, this is generally indicates worn rings or bores or both. Often this goes in hand with worn bearings - what's the oil pressure like?

If you are also loosing coolant, that is more likely to be a head gasket problem. It sounds to me like you need to bite the bullet and rebuild the whole thing.

I have rebuilt two of these motors and replaced a head gasket on a third, all done without the special tool (although now I have one). Not having one means you have to remove the rocker gear to re-torque several of the head bolts; a nuisance, but hardly the end of the world. The tool itself is kind of like a double ended ring wrench that someone has bent into a "[" shape - one end has the correct size 'ring wrench' head for the head bolts, the other has a 1/2" square drive for the torque wrench.

Cheers, Vic
 

Wombat

Donation Time
My Father was Shop Foreman at the local Chrysler/Rootes dealership and had one of these in his toolbox. I am kicking myself for not getting it when he retired. But the alloy heads are retorqued cold so removing the rocker gear will not affect the result (just more work sa Vic says). Curiously the Chrysler OZ factory manuals say that for the HB Hunter (the 1967 model) The iron head is to be tourqued HOT (no alloy head on that model in OZ), For the HC (1969/70 approx) the alloy head was to be torqued COLD and the iron head HOT and for the last of them, the HE (1970/72ish) both the iron and alloy heads were to be torqued COLD. Seems like they were making it up as they went along :)
 

lemansvk

Donation Time
Rob and others,

To be correct I do not have the actual "Churchill" tool for this, I have the one made (in Australia I think) by Litchfield. These appear from time to time on Ebay (I've seen at least 3) but you need to be patient and watchful and have a search going - they can turn up in car stuff or among tools. I'll upload a pic somewhere later today

Cheers, Vic
 

Mark B

Donation Time
John-

It is not a really big deal if you do not have the wrench. When you go to retorque the bolts, you simply have to remove the rocker gear, (the whole assembly can be lifted off as a unit once all of the nuts are removed and the oil feed pipe is disconnected). The trick is the oil pipe connection which can be a challenge to reconnect. I pre-thread it when the rocker gear is loose and then fully tighten it when I have the rocker assembly tightened down.

It probably adds 15 minutes to the job to not have the wrench, but is not a deal breaker. BTW, Hold on tight to those nuts and washers if you are taking off the rocker gear. Dropping them down into the pushrod area can be a pain.

Thanks,

Mark B
 

ozzie alpine

Bronze Level Sponsor
For some reason my rocker oil feed pipe is permanently fixed at its upper end, and so to remove the rocker assembly I have to remove the side cover and undo the lower pipe connection.
So I made myself a "special tool" so that I could tighten the head bolts with the rocker gear in place. Made with a spanner/crescent wrench, bent into a U, and an old socket welded on top to allow the torque wrench to be used. Looks ugly but seems to do the job.
 

lemansvk

Donation Time
As promised here's my "Non-Churchill" head spanner (hope this works, having not posted a pic before :))

Vic
 

Attachments

  • headwrenchSm.gif
    headwrenchSm.gif
    16.5 KB · Views: 44

JConstable

Donation Time
Vic,
Thanks for the picture. I had a couple of possible images in my mind as how such a wrench might look, but it helps to have an image. As I have spoken to my engine folks around here and reading various forum threads I think I have to say UNCLE! and accept the full engine rebuild even though it will keep me off the road during the beautiful spring weather of Central California. The grudging acceptance of this fact will certainly cause me to continue to tap the Alpine expertise available on the forum. Thanks all.

John :)
 

Alpine 1789

SAOCA President
Diamond Level Sponsor
Here's a shot of the wrench I made a couple of years ago after seeing a photo of the Churchill one. There is a captured nut inside the top, which keeps the bolt from turning. I wasn't sure if it was going to work, so I used a very cheap wrench from a discount tool store. 50lbs is about about the limits of its strength after heating/bending. I am planning on trying again this year, using a heavier duty one this time.
 

Attachments

  • wrench.jpg
    wrench.jpg
    7.7 KB · Views: 44

Ken Ellis

Donation Time
Was thinking about the Churchill tool, and how to come up with a functional equivalent.
(Although I suppose it's possible to just buy one, that would be too easy!)
Here's the 1000 words the picture would be worth:

Two of the correct size crowsfoot box-end wrenches, plus one 3/8" (or 1/2") square bar stock, about 4" long or so, plus one 'coupler nut' of the same size, (a hex nut that is about 1 1/2" long) would all fit together to make a functional equivalent. For limited use, I would just wrap the junctions with electrical tape to keep it from falling apart.

I suppose if you had enough room, you could do it with two identical offset-boxend wrenches and two coupler nuts, too.

If you choose to just use a single crowsfoot attachment, and if you don't bring the torque wrench's center of rotation back to the center of the bolt, then here's a couple of interesting options...

First this:
http://www.cncexpo.com/TorqueAdapter.aspx

And then, this:

"Here is the formula: M1 = M2 x L1 / L2
Where:
M1 is the torque setting of the wrench.
M2 is the actual torque applied to the nut
L1 is the normal length of the wrench
L2 is the extended length of the wrench (Length of wrench + length of adapter)
Example:
M1=torque wrench setting ?
M2=80 FT-LBS (Desired touque)
L1=18" (Legnth of torque wrench)
L2=22" (Total length of wrench with 4 inch extension added to wrench)
80x18/22=65.45 M1 therefore = 65.45; In otherwords if you want to torque a fastener to 80 FT-LBS using an 18 inch torque wrench with a 4 inch torque
extender you will set the wrench to 65.45 FT-LBS
Richard D. Scherrer
Airframe and Powerplant mechanic - Kalispell Mt , USA"

And another from the same list:

"I ran across your question when searching for an inch lb torque wrench. I purchased a Husky brand from Home Depot. The instruction sheet has the formula for calculating the torque with a crowsfoot. E- Effective length of extension - measured along the centerline of the torque wrench. L Lever length of the wrench - center of grip to center of drive. T(W) - Torque set on the wrench. T(E)- Torque applied by the extension to the fastener.
T(W) = T(E)* L/L+E
T(E) = T(W)* (L+E)/L
I'm not endorsing Husky or Home Depot - I just provided those for fyi."

When you marry these discussions with the one regarding the accuracy of common torque wrenches, well... who knows what'll happen.

Ken
 

Nickodell

Donation Time
Jim, I like your design, which places the top bolt, where the torque wrench would be applied, directly in plane with the bottom box-end to be applied to the head bolt. It should in theory require no calculation, but should give the exact torque as read on the wrench.
 
Top