• Welcome to the new SAOCA website. Already a member? Simply click Log In/Sign Up up and to the right and use your same username and password from the old site. If you've forgotten your password, please send an email to membership@sunbeamalpine.org for assistance.

    If you're new here, click Log In/Sign Up and enter your information. We'll approve your account as quickly as possible, typically in about 24 hours. If it takes longer, you were probably caught in our spam/scam filter.

    Enjoy.

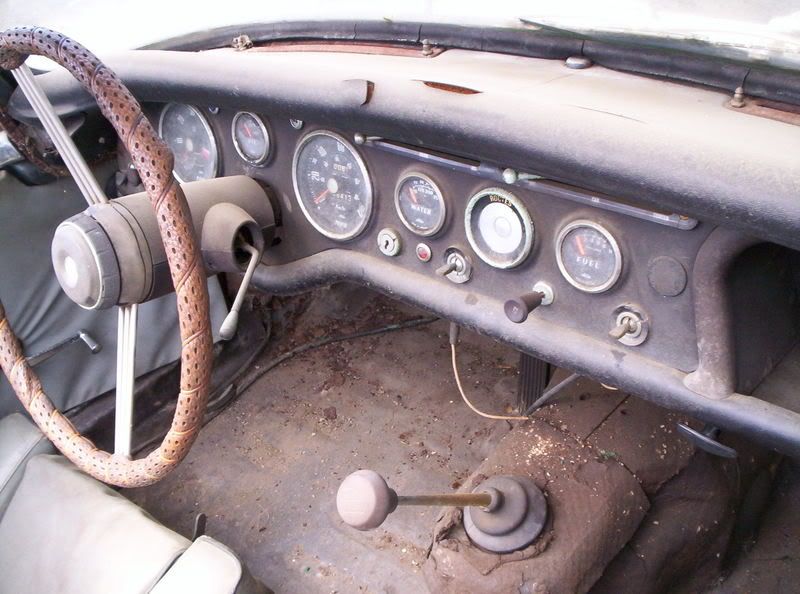
Dashboard template...again

Series6

Past President
Gold Level Sponsor
new information

I called my local Kinkos and was asked to e-mail the PDF. $3.00 per copy of a 4 foot x 1 foot sheet. I ordered 5 cause I'm bound to mess up the first ones. I'll advise later today how they came out.
 

Series6

Past President
Gold Level Sponsor
No sweat.

Went to Kinkos and they had the first one printed for approval. Perfect. $3 per print. :D


Latest-Mounted it to cardboard and cut it out. Fits perfectly.
 

miket

Donation Time
I just ordered a sheet of walnut burl Formiac. The sample look terrific. I'll post a picture when the first is cust out. (I'll have plenty of extra sheets if anyone is interested).

But in either case, I beleive that using a clear that is not affected by UV is key. Apparently there are a viriety of products for making bar tops that could work quite well.

Good luck,

Mike
 

alpine_64

Donation Time
the importantn thing that this drawing is missing is the shaped cutouts on the back that the switches, guages and lighter etc seat into
 

dmich2

Donation Time
Mike is SOOOOO correct. When my brother did my dash, and he doesn't really know an Alpine from a Pinto :(, he used an old wooden one George Colemen lent me as his template) The routed out areas on the back need to be known as I found out later. It's a long story, but my brother, who lives in PA was doing the cutting for me, I'm in NC and communication wasn't good. He assumed, and I concurred, (mistake #2) that the square routed areas were not critical for the switches, i.e., blower, wiper,etc. Well they are, as the stock switches are square, and that means they don't fit well in round holes,.:mad: So I had to do some grinding, not fun. I holeheartly suggest getting a look at the back.

All that being said. In the case of an aluminum dash, where the thickness would not be an issue it's a mute point.

Good luck. I can't wait to see your finished product.

Dennis
 

66Tiger

Donation Time
the importantn thing that this drawing is missing is the shaped cutouts on the back that the switches, guages and lighter etc seat into

I used aluminum so I never finished what the back side looks like for a thicker wood dash. I made a sketch but never converted it to my computer.

Seems like you could just cut the gauges out then router the back sides for brackets. Maybe for the switches just drill a small centering hole to locate their position then router a square out. With a little effort it can be figured out, it's really not a big deal for anyone who could make up a dash panel in the first place.

If someone wanted I could probably do a backside PDF up this weekend.

Paul
 

Jeff Scoville

Donation Time
I made mine out of stainless steel, then brushed it with a scuff pad for grain and urethane cleared it.
When I had the car at the British car show near Chicago in September, most of the business cards I gave out were for inquiries ass to making dashes for folks.
Not sure if this link will work, but if not you can see the finished project in the "Reigonal news" area in a post by Todd Norby.

BUt I'll try this,

http://rides.webshots.com/photo/2866652450097021798KkvUJD
 

mikephillips

Donation Time
And with a wood dash you also need a square piece to slip over the end of the ignition switch. This fits into a square routed out on the back and keeps the switch from rotating when you turn the key.
 

the ghoul

Donation Time
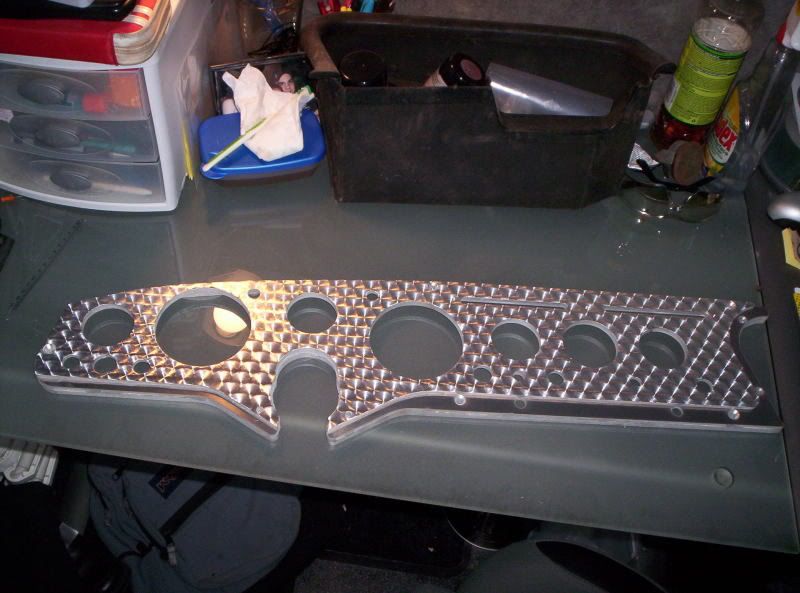
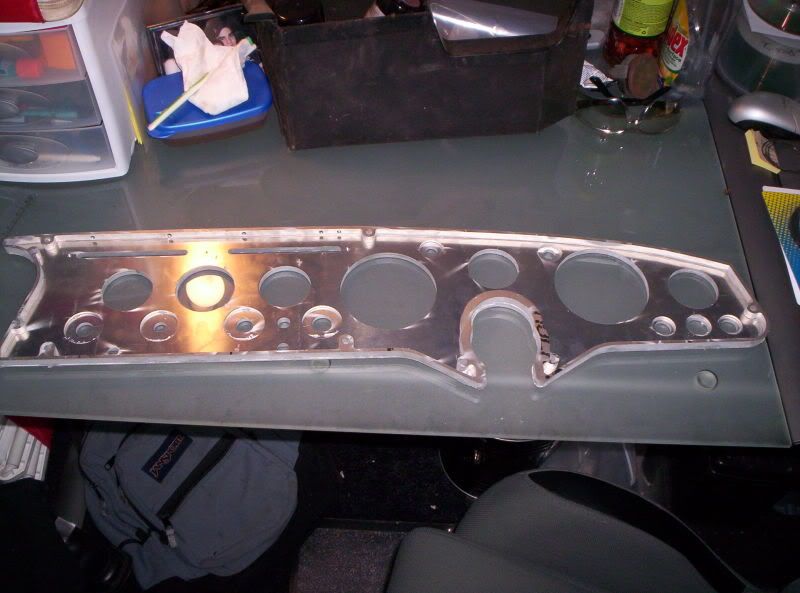
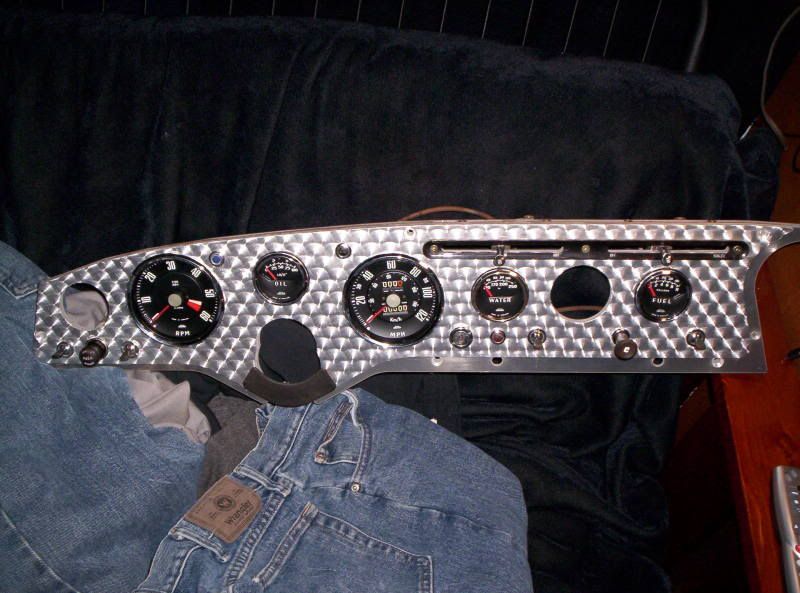
I think I ended up going a little overboard....
Email me for all the autocad files if you have the means of making one of your own cudaeh@yahoo.com Make the subject something like 'auto cad file request' or something other than just 'hi'
The facade layer and the middle layer are 1/8" aluminum and the backing layer (structural ribbing) is 3/8". They are all held together by clear silicone. I created the pattern by taking a 1" wire brush binding the bristles tightly together with wire and putting it in a mill (same thing could be done on a drill press). I then touched the brush to the surface every 3/4" and spaced the rows apart every 1/2".
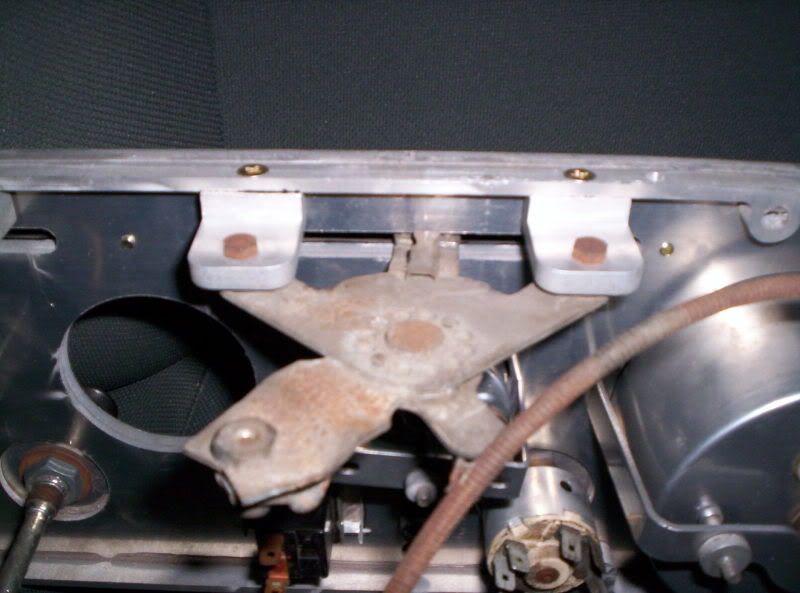
The only thing truly trick here is the heater control mounting tabs I had to make...
My one regret on this whole project is how I made the jeweled pattern. The wire brush was a bit too abrasive and galled up the surface a bit. I’m going to play around with wood and metal dowels and some valve lapping compound to see if I can get a better finish out of it…
11-20-08005.jpg

11-20-08006.jpg

11-20-08010.jpg

11-20-08011.jpg
 

Alpine 1789

SAOCA President
Diamond Level Sponsor
I think I ended up going a little overboard....

Beautiful dashboard! I have been thinking about doing the same thing for my V6 project, only I was planning on just gluing a thin piece of aluminum veneer to a plastic dash I have laying around. I've been trying to find a piece of aluminum that was already machine turned, because I thought the process would be incredibly difficult to get right with a drill press. How did you get the spacing so perfect?
 

the ghoul

Donation Time
I used a mill. and truthfully, its not perfect. there were a couple of places i fudged it, over/under spaced ect... I would be very confident laying out the pattern with chalk and doing it on a drill press. the beauty of this pattern is if you do fugg-up some where its tough to tell because you are dealing with so many circles your eye gets confused.
get your self some scrap and just play around with it.
I was thinking the same thing though, getting a chunk of pre-jeweled metal, but I decided that if I was going to be having it wetter cut it would get 'fogged' around the edges. so I didn’t look too much into it.
The issue I had with just doing a veneer panel is the gauges are raised so you would see a black ring around each one.. I didn’t like the idea of that, but if you have no problem with that, i think it would be a much easier way to go about it.
Also, I think there are companies out there that are selling adhesive backed plastic veneer’s for shop cabinets that would be durable, easy to cut and form and might conform to the gauge risers with a little bit of heat.

Beautiful dashboard! I have been thinking about doing the same thing for my V6 project, only I was planning on just gluing a thin piece of aluminum veneer to a plastic dash I have laying around. I've been trying to find a piece of aluminum that was already machine turned, because I thought the process would be incredibly difficult to get right with a drill press. How did you get the spacing so perfect?
 

alpine_64

Donation Time
That is a great looking dash... however the sunglasses are a good point.. trust me.... you are going to want to dull it up.. wait for a sunny day when the sun is behind you.. i was lucky enough to experience this pain in a bugatti T35.. was just happy i was not the one dealing with driving a very valuable car and no vision :cool:
 

the ghoul

Donation Time
yeah , the clarcoat should knock it down a bit
If not Ill mix some 'smoak black' into the clear.
That is a great looking dash... however the sunglasses are a good point.. trust me.... you are going to want to dull it up.. wait for a sunny day when the sun is behind you.. i was lucky enough to experience this pain in a bugatti T35.. was just happy i was not the one dealing with driving a very valuable car and no vision :cool:
 

Jeff Scoville

Donation Time
That is a great looking dash... however the sunglasses are a good point.. trust me.... you are going to want to dull it up.. wait for a sunny day when the sun is behind you..

I considered that same point when making mine and almost went with a Satin clearcoat, but then after looking at how flat the angle of the dash is in the Alpine, I've had no problems.
Now with the beautiful machining on yours, it may reflect quite differently.
Love your work though, I think personalizing the dash while keeping the stock layout is the key, I've seen some "home-made" dashes before that just look too strange with the gauges all relocated, isn't all this stuff just a blast!
It's no wonder it takes some of us so long to re-do our cars!
 

the ghoul

Donation Time
thank you all!
I still stand by this statement though; If I can do it any one can, and I will be more than happy to answer any questions any one has on any of my work. The only advantage I have on most is I work in a full prototype fabrication shop and have access to just about any machine you can think of. :D
 
Top