• Welcome to the new SAOCA website. Already a member? Simply click Log In/Sign Up up and to the right and use your same username and password from the old site. If you've forgotten your password, please send an email to membership@sunbeamalpine.org for assistance.

    If you're new here, click Log In/Sign Up and enter your information. We'll approve your account as quickly as possible, typically in about 24 hours. If it takes longer, you were probably caught in our spam/scam filter.

    Enjoy.

Location of Lift-A-Dots and Snaps

Bikesandfires

Donation Time
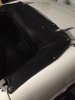
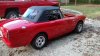
Just about done installing the new top and it's time to add all the snaps. It's a Robbins top and they sent 2 lift a dots, and 4 button snaps. Is that right? The top that was on the car when I got it didn't have ANY snaps installed on the side flaps so I don't even have incorrect information to go by. I'v tried looking at cars in the gallery and some have snaps..some lift a dots, and most of them you can't tell.
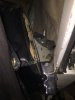
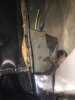
SS has 2 types of lift a dots listed in the catalog, and I have some of both, but don't know where hardly any of them go. I think the 10-32 threaded one go in the dash for a tonnuo cover. The console still has one in the side of it for some reason. I have 2 holes in each door, and 2 on each side of the trunk hinges.
Can someone help me out with a decent description or pics of where they all go, and what goes in each location?
 

alpine_64

Donation Time
The lift dot ( ones that go over the pegs) are the 2 front securing points at the edge of the b post ( they are used on the tenneau cover) the snaps go at the rear 1 each side, assume the additional 2 are for the flap that goes into the drain channel
 

Greggers

SAOCA Vice President
Platinum Level Sponsor
For the top, it should be lift-a-dot near the door, snap further back. The second set of snaps should be down in the top cavity near the hinge, presumably to keep the top taut and help direct water runoff to the drain.

If need be, I can attach a picture of my boot cover, showing the (approximate) location of the two lifts and two snaps the top shares with the boot.
 

Bikesandfires

Donation Time
Yes... Pics would be great!! Especially the one that's in the drain cavity. I didn't have a clue there would be one in there..
 

Bill Blue

Platinum Level Sponsor
Yes... Pics would be great!! Especially the one that's in the drain cavity. I didn't have a clue there would be one in there..
Do you suppose that is why I had a lot of trouble channeling water into the trough?

One other pointer: When installing the Lift-a-Dot, make sure the top is kept against the frame of the top and fender. If you wish, I can probably post a pic of how not to do it.

Bill
 

Bikesandfires

Donation Time
Do you suppose that is why I had a lot of trouble channeling water into the trough?

One other pointer: When installing the Lift-a-Dot, make sure the top is kept against the frame of the top and fender. If you wish, I can probably post a pic of how not to do it.

Bill

Please do Bill, I'm not quite sure what you are saying...unless you mean that I should NOT try to pull the flap down the side of the car when I position the snaps?
Do you have problems with water running into the interior?
 

Bill Blue

Platinum Level Sponsor
Please do Bill, I'm not quite sure what you are saying...unless you mean that I should NOT try to pull the flap down the side of the car when I position the snaps?
Do you have problems with water running into the interior?

Here is my top:


Note the gap between the flap and the side curtain. A considerable amount of water enters at this point while on the road. If the internal flap is properly arranged, the water is channelled into the tray and drained out of the car. My problem was finding the magic configuration of the internal flap. That consisted mostly of cutting it down to size and gluing rare earth magnets onto it. As received, it was so long the water missed the drain.

When everything is working properly, the extra water is no problem, but the extra gap acts as a scoop and catches a lot of air, making cold weather driving unnecessarily chilly. In summer, it defeats the A/C.

Bill
 

alpine_64

Donation Time
Bill,

While the rare earth magnets are an ingenious solution, and made me giggle, the factory had a series of little metal clips to hold the flap onto the drain rail , ss used to sell them, now I think they just supply the ones used to hold the bonnet seal on the inner front valence
 

Bikesandfires

Donation Time
Bill,

While the rare earth magnets are an ingenious solution, and made me giggle, the factory had a series of little metal clips to hold the flap onto the drain rail , ss used to sell them, now I think they just supply the ones used to hold the bonnet seal on the inner front valence

Did some cars come with clips in the drain channel, and others have clips? Or is there supposed to be clips AND snaps for the drain channel?
 

alpine_64

Donation Time
Both, the 1 snap per side which holds the flap against the face of the inner body towards the front then the little metal clips hold the flap along the drain channel 3 per side iirc
 

Greggers

SAOCA Vice President
Platinum Level Sponsor
Sorry for the delay, Bikes. I finally got a chance to head out to the garage. Attached are three images, one of my top boot, one of the channel button, and one of the channel button unsnapped. The button in the channel is approximately 3/4" away from the nearest point on the edge of the cutout (where you can see Pete's Performance Wiring kit, btw).

This is not to say that mine is correct, just that it's there. Of course, the channel area seems unmolested from original.
 

Attachments

  • Button1.jpg
    Button1.jpg
    32.4 KB · Views: 63
  • Button2.jpg
    Button2.jpg
    41 KB · Views: 60
  • Button3.jpg
    Button3.jpg
    38.5 KB · Views: 65

Bill Blue

Platinum Level Sponsor
Gee, I wish I knew about that snap seven years ago. The snap base had been removed, so I plugged the holes. Genius, NO!

The strange thing, I made several inquiries about how to position the flap as I had terrible water issues and no one seemed to know.

Greg, is it necessary to unsnap the flap when storing the top?

Bill
 

Greggers

SAOCA Vice President
Platinum Level Sponsor
Greg, is it necessary to unsnap the flap when storing the top?

Bill

I've never had to unsnap it, but A. It's an aftermarket AMCO top that wasn't installed very well, and B. It sometimes magically unsnaps itself during the top-stowage process. So as usual, YMMV.
 

Bikesandfires

Donation Time
Sorry for the delay, Bikes. I finally got a chance to head out to the garage. Attached are three images, one of my top boot, one of the channel button, and one of the channel button unsnapped. The button in the channel is approximately 3/4" away from the nearest point on the edge of the cutout (where you can see Pete's Performance Wiring kit, btw).

This is not to say that mine is correct, just that it's there. Of course, the channel area seems unmolested from original.

Thanks for the pics Greg, it's starting to make a little sense now. Do you have a pic of where the clips go? I didn't see them in the ones you posted.
Whoever installed the top I just took off didn't get it anywhere near right I don't think. They never installed any of the snaps, even the ones on the flaps. I didn't take any clips off and I don't see anyplace on the top fabric where they might have been in the past. They didn't even bother to trim the excess fabric where it wrapped around the windshield bow(header).
 

Bikesandfires

Donation Time
Both, the 1 snap per side which holds the flap against the face of the inner body towards the front then the little metal clips hold the flap along the drain channel 3 per side iirc

Could you..or anyone else here.. please post a pic of where these clips attach?

I looked long and hard at the drain cavity yesterday and cannot figure it out. Not having the clips yet probably isn't helping, but I assume they look like the ones in the catalog.
 

alpine_64

Donation Time
Could you..or anyone else here.. please post a pic of where these clips attach?

I looked long and hard at the drain cavity yesterday and cannot figure it out. Not having the clips yet probably isn't helping, but I assume they look like the ones in the catalog.

I'll have a look for some pictures I took a while back of some original cars with them, The coorect clipscare like a bent c, with rolled edges. Ss used to sell them, now apparently they just use the bonnet seal clips, you might be able to get correct type secondhand or from someone like moss motors
 

Bill Blue

Platinum Level Sponsor
How about using the small paper clamps. The ones made of spring steel. They used to be call "Bulldog" clamps. They have good gripping power and the wires are easily removed after installation.

Bill
 

Bikesandfires

Donation Time
Those tiny binder clips just might work.... Good idea!. I'v got some at the office. I'm out of town this week, but when I get back I'll give them a try.
 
Top