• Welcome to the new SAOCA website. Already a member? Simply click Log In/Sign Up up and to the right and use your same username and password from the old site. If you've forgotten your password, please send an email to membership@sunbeamalpine.org for assistance.

    If you're new here, click Log In/Sign Up and enter your information. We'll approve your account as quickly as possible, typically in about 24 hours. If it takes longer, you were probably caught in our spam/scam filter.

    Enjoy.

Alpine Seats - original ?

SierraNev

Diamond Level Sponsor
Good morning,

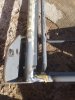
Yesterday I got adventurous and pulled the drive seat out of my Series V. Since purchasing this car in late June, I have seen more and more bits of "stuffing" falling out of the seats. After gently taking them apart, I found the stuffing in the middle stuck to the seat cover and the edges brittle and rapidly turning to dust. The seat was butt sprung when I got it and has become considerably less comfortable.

I plan on a quick fix with some left over foam until I can decide on what to do with the interior.

I have attached photos of my progress. Does this look original? I think the board was added when the stuffing started to give out. It looks like a rubber mat was used to keep the bottom of the seat together.

Just wondering.

Thanks All

EmmettDriver's Seat 1.jpg Driver's Seat 2.jpg Driver's Seat 3.jpg Driver's Seat 4.jpg
 

puff4

Platinum Level Sponsor
The third photo down is a good photo of the original stuff, albeit falling apart. New foams and diaphragms are available. The diaphragms are a PITA to fit, but will improve immensely the comfort and height of the seat.
 

puff4

Platinum Level Sponsor
If you do plan to restore your seats, you might want to add heated panels at the same time. It's inexpensive and easily hidden (to keep things looking original) but make an immense improvement on top-down driving in cool weather.


My seats, before and after I restored them.


Adding the heating panels is a cinch.
 

SierraNev

Diamond Level Sponsor
Wow ! thanks for the info. You have obviously been down this highway before.

Where did you locate the foams and diaphragms? The heating element is a great touch, how did you hook that up?

A million more questions to follow

Emmett
 

puff4

Platinum Level Sponsor
Diaphragms and foams should be available through our usual Sunbeam parts suppliers. I bought mine 35 years ago, along with the Martha Wheat (aka ProPrep Interiors) covers, and only used them about 5 years ago. I tend to buy parts long in advance, under the assumption that it won’t be available when I really do need it.

As for the panels, it’s a bog standard set of Dorman panels - very inexpensive.

https://www.amazon.com/gp/aw/d/B002U6IL9O/ref=cm_cr_arp_mb_bdcrb_top?ie=UTF8

I hid the switches under the dash so you can’t even see the evidence unless you spot the wires coming from the seats. I attached the panels to the foams using Weldwood solvent-based contact cement.
 

puff4

Platinum Level Sponsor
One thing to check, though… thoroughly inspect the chair frames for cracks - it’s a common problem, particularly on the driver’s seat. Mine were fine, but I’ve seen a great many that are badly cracked. If it is cracked, a good welder can sort it for you, and perhaps insert some strengthening gussets.

Also, be careful removing the pivot screws - they are unique to these seats and not US thread. Get a proper sized (large) flat bladed screw bit and use that to remove them… and don’t lose them. Replacements are available, but few suppliers have them.
 

alpine_64

Donation Time
As kevin said the frames are often cracked on the rear squab at the base.. They also twist. This is from people leaning on them when they get in and out of the car.

Check they are not twisted.. And you can ads a guset at the lower joint to strengthen them.
 

Paul354

Diamond Level Sponsor
Photo of a lower seat repair Driver side
 

Attachments

  • 20220320_165457.jpg
    20220320_165457.jpg
    418.6 KB · Views: 64
Top