• Welcome to the new SAOCA website. Already a member? Simply click Log In/Sign Up up and to the right and use your same username and password from the old site. If you've forgotten your password, please send an email to membership@sunbeamalpine.org for assistance.

    If you're new here, click Log In/Sign Up and enter your information. We'll approve your account as quickly as possible, typically in about 24 hours. If it takes longer, you were probably caught in our spam/scam filter.

    Enjoy.

2.8 Head Water Passage Modifications

Beamin

Platinum Level Sponsor
I‘ve got an exhaust leak along the bottom of the header that I can’t seal up. Before reinstalling the motor, I should have pulled the heads and done DanRs modifications plugging the emission ports along the bottom of the head and drilling for the additional header bolts but I was overly optimistic that it wasn’t an issue before I pulled the motor, so everything should be fine putting it back together. Anyway, I‘ve pulled the heads and will be heading to my machine shop tomorrow to have the work done.

While the heads are off, I want to drill the additional cooling passages that I keep reading about, but I keep coming across different info. Some recommend just two additional holes. Some say drill all four. Seems like more holes = more cooling. Is there any reason NOT to drill all four holes in each head?
 

DanR

Diamond Level Sponsor
Andy, I can send you the info on how I do them, (same as recommended by Sven P).

E-mail me
 

absunbeam

Platinum Level Sponsor
Followed the recommendation in Dan’s V6 instruction. Found the casting cavity is offset on the lower drilling and just catches it. Should help in keeping a cooler head.
Plugging the exhaust holes and milling them off will keep things quiet. Eliminating all for the smog equipment which kept the heads hot and eventually cracks them helps.
 

Beamin

Platinum Level Sponsor
Water passages are drilled. Love the information on this site. Found a picture of a head that someone cut in half showing the water passages, which made it easy to figure out which way to angle the bit on the lower passages.

Plugged the exhaust holes, ground flat, then drilled and tapped for the lower header bolts as per Dan’s recommendations.

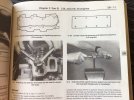
Time to put it all back together. Does anyone know the proper torque sequence and specs? Google search turns up various torque values.
 

absunbeam

Platinum Level Sponsor
This is from the Haynes manual.
 

Attachments

  • IMG_2522.jpeg
    IMG_2522.jpeg
    1.7 MB · Views: 20
  • IMG_2521.jpeg
    IMG_2521.jpeg
    1.6 MB · Views: 21
Top