Just a thought: on a freshly prepped and painted surface, why not leave the pins in but skip the clips and use tape to hold the badges on? It might make putting the tape on the trim more difficult, but you'd end up with the best of both worlds: pins to position the trim, a seal against the elements (at least from one side), and paint inside the hole to protect it from rust.My plan on the trunk letters is to grind off the pins and fill the cavities with epoxy.

-
Welcome to the new SAOCA website. Already a member? Simply click Log In/Sign Up up and to the right and use your same username and password from the old site. If you've forgotten your password, please send an email to membership@sunbeamalpine.org for assistance.
If you're new here, click Log In/Sign Up and enter your information. We'll approve your account as quickly as possible, typically in about 24 hours. If it takes longer, you were probably caught in our spam/scam filter.
Enjoy.
You are using an out of date browser. It may not display this or other websites correctly.
You should upgrade or use an alternative browser.
You should upgrade or use an alternative browser.
side trim
- Thread starter bobbo
- Start date
Ken Ellis
Donation Time
Just a thought: on a freshly prepped and painted surface, why not leave the pins in but skip the clips and use tape to hold the badges on? (snip)
I failed to go into detail, but the bodywork/paint was already finished on my car before I bought it. Body shop had filled in all the holes -- for badges, letters, and tonneau cover fasteners. Only exception is the (incorrectly-placed) Alpine script. So the boot is baby-butt smooth. Even re-drilling the holes would risk chipping bondo and paint.
I did just recently locate the tonneau fastener holes and install them, and had to be cautious re-drilling those holes due near, but not necessarily thru, the original holes. Chipping was avoided by starting with a 1/16" drill with a dremel as a pilot hole, then advancing to final size. Didn't cover with tape first because I wanted to keep an eye on things all the way through. Went well.
Todd's experience is encouraging. I'd be shopping for the thinnest overall thickness available, unless fitting flat features on a curved surface.
65beam
Donation Time
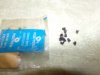
Photo of the original emblem clips from my collection of parts. These were made in such a way that the clip set flush on the outside and were locked into the opening on the inside of the panel. Somewhere at a later date there was another barrel clip available that was a similar style to the clips that holds the scuttle vents . These clips allow me to remove the emblems for cleaning the body.Well, it's stuck on everything I've asked of it. (Like brake controllers to dashboards, phone and camera mounts, signs to poles, etc.) But I won't be attaching trunk letters to the car until next spring.
Auto manufacturers have used it for trim and bling for several years, though.
Trailer mfg's use it to stick on siding to utility trailers for a fastener-free look... and that has actual structural constraints, too.
There are high-temp and aircraft variants, too. Here's some application info from the horse's mouth, as it were...
https://www.3m.com/3M/en_US/vhb-tap...MIj9H4l8WI3gIVBVYMCh0AwgjOEAAYASAAEgLsI_D_BwE
Lots more info shows up in a google search, including both company propaganda and "here-hold-my-beer-and-watch-this" videos on YouTube.
I wouldn't hesitate to use it to stick on side trim, letters, badges, or misc. bling. Creating a flat surface on the bottom of the trim would be key, to increase the bondable surface area. I would bet it would even hold on outside rear-view mirrors with the prep below, if you stayed away from car washes. My plan on the trunk letters is to grind off the pins and fill the cavities with epoxy. Let that cure, then apply tape, Xacto to shape with slight undercut, align, pray, and apply after cleaning the surface. While it's difficult to rip off, it does respond to cutting with dental floss thru the foam, then rubbing/rolling up the adhesive with your thumb/fingers. Plastic razor blades can do the job, but more aggressive tools risk the surface finish, as you might guess.
For long skinny trim held on by widely-spaced clips, the task would be to get things flush. But 100% tape coverage might be too much, and would make trim proud of the car's surface by 1/16" or so. So the task would be to get the clips to have a tape-installed height the same as a screwed-on install. I'm not up to speed on what those clips are like, but I'm guessing they would need to be slightly recessed (to tape thickness) before applying tape in that recess. It may be necessary to use more clips to build up total surface area. Designing and 3-D printing clips that are 'just right' might be the best bet, instead of sourcing and modifying original-style clips.
Do you have a close-up photo of the clips?

Attachments
Last edited: