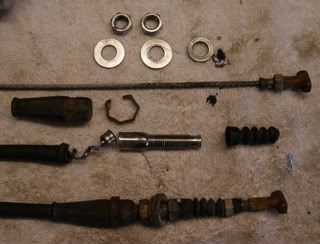
• Welcome to the new SAOCA website. Already a member? Simply click Log In/Sign Up up and to the right and use your same username and password from the old site. If you've forgotten your password, please send an email to membership@sunbeamalpine.org for assistance.

    If you're new here, click Log In/Sign Up and enter your information. We'll approve your account as quickly as possible, typically in about 24 hours. If it takes longer, you were probably caught in our spam/scam filter.

    Enjoy.

Winter Disk Brake Project coming along.

Duke

Donation Time
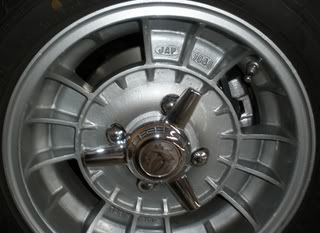
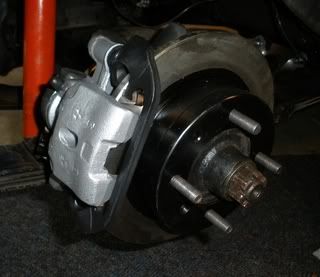
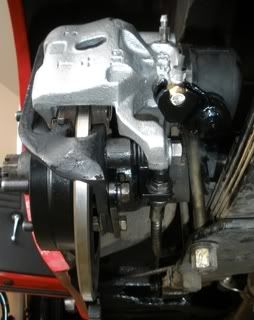
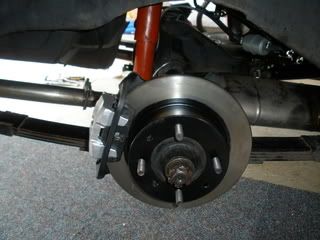
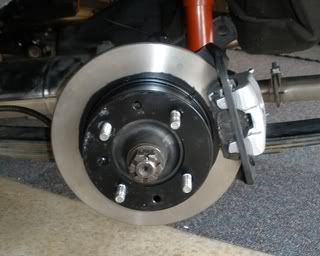
Winter Disc Brake Project coming along.

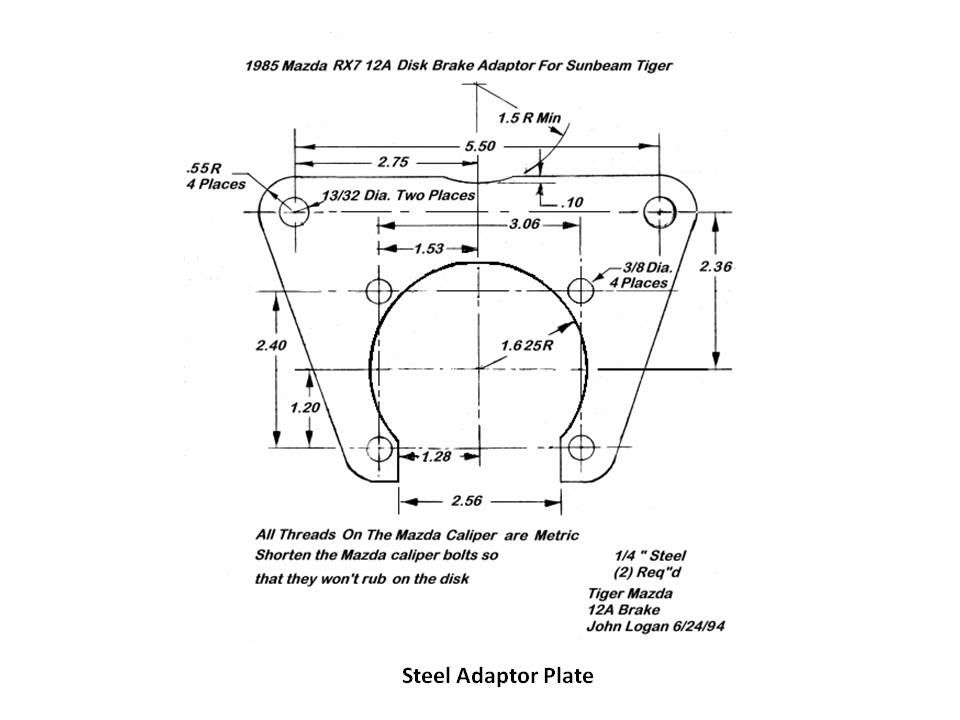
I am using John Logan's article in Rootes Review, Vol. 33 No. 5. May 2007 for this conversion.

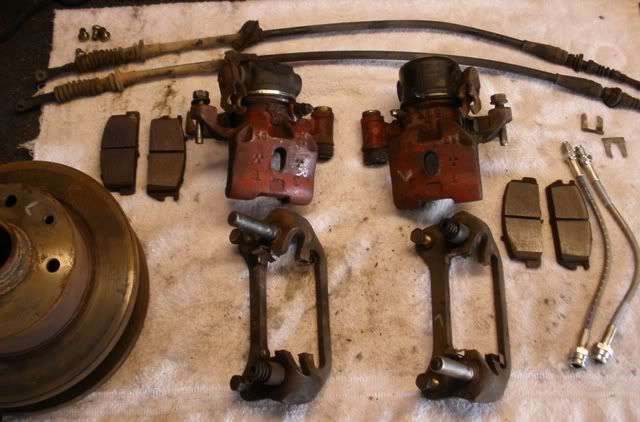
I tell ya, 79-85 RX7 brake assemblies are not easy to find. I joined a RX7 forum and got these from a guy parting out his car.

Do not use the online salvage yard parts locators, you will be very disappointing at what you get. I paid $260 for complete rear brake assemblies both R & L. I receive just the calipers and they were in such bad condition that they could not even be used for cores. It took over a month to get a refund too.

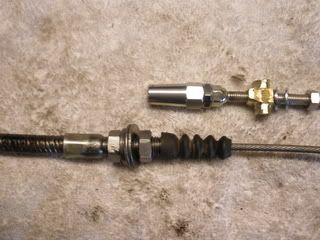
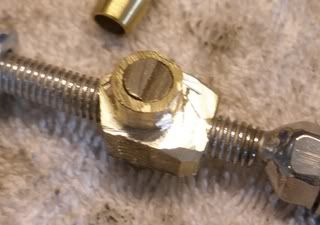
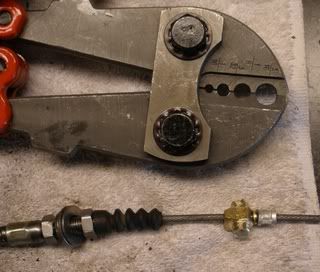
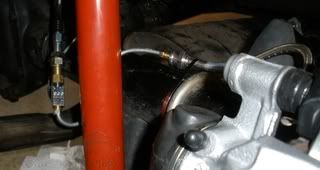
I also got two rear stainless steel bake lines from another member of that forum. Just try to buy rear SS brake lines alone. They are only sold as a complete set new.

035.jpg


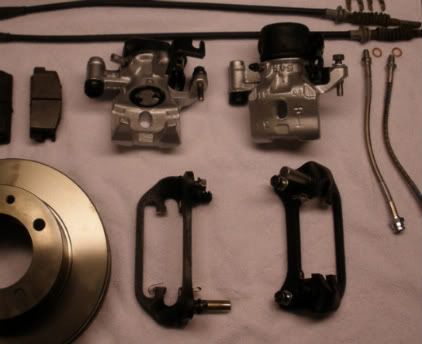
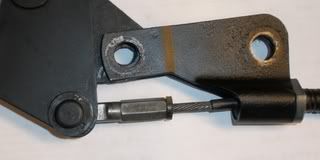
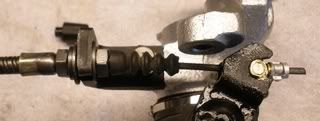
They have cleaned up nicely and are now Tiger worthy.

006-6.jpg


The rotors ID were cut by a local machine shop on a lath.
 

64beam

Donation Time
Hi Duke,

The disc's and caliper's cleaned up very nicely. If you are looking for braided brake lines, you could try some of the hydraulic hose shops around where you are. My local hydraulic shop told me that they can get custom brake lines made up that are compliant with our vehicle requirements here in Australia. Not sure of their cost though.

Keep us posted on your install.

P.S How is that stroker motor going?

Regards, Robin.
 

Duke

Donation Time
If you are looking for braided brake lines, you could try some of the hydraulic hose shops around where you are.
P.S How is that stroker motor going?

Hey Ron,

I have stainless steel braided lines (see above pictures). I just need to make the hard lines from them to the "T" I am going to install to the line that goes to the rear axle from the body.

The stroker will get finished in March/April.
 

64beam

Donation Time
Hi Duke,
The other option is to run your hard lines as per a standard Tiger. Run hard line to each of the calliper's and then you only need one braided line from the body to the diff.
Regards, Robin.
 

Duke

Donation Time
Hi Duke,
The other option is to run your hard lines as per a standard Tiger. Run hard line to each of the calliper's and then you only need one braided line from the body to the diff.
Regards, Robin.

The problem with that is pad R&R. The calipers are designed to swing up (rotating on the large rod on the mounts) to remove them. Unlike the frontcalipers. I would have to open the brake system to do that with hard lines.
 

64beam

Donation Time
Hi Duke,

So all the pieces shown in your pictures is all you need to adapt these to your Tiger? Is it possible to post a copy of the article that you made reference to?

Thanks, Robin.
 

Duke

Donation Time
What is not shown are the adapter brackets to mount the calipers. I am having mine made local from the plans posted in the article.

Adapter brackets are available from John Logan Jr. He can be reached at: 2045 N Lafayette St. Dearborn, Mi. 48128; Phone. (313)-563-8625 slainte@peoplepc.com

I don't know how to post a .pdf file of the article or where to host it. Shoot me a PM with your email addy and I will send you a copy.


AdapterPlate.jpg
 

64beam

Donation Time
What is not shown are the adapter brackets to mount the calipers. I am having mine made local from the plans posted in the article.

Adapter brackets are available from John Logan Jr. He can be reached at: 2045 N Lafayette St. Dearborn, Mi. 48128; Phone. (313)-563-8625 slainte@peoplepc.com

I don't know how to post a .pdf file of the article or where to host it. Shoot me a PM with your email addy and I will send you a copy.


AdapterPlate.jpg

Hi Duke,

I have sent you an email.

Thanks, Robin.
 

Duke

Donation Time
A pic of the right side. Trial fit before the brake line is attached and pads. So far, so good.

002-16.jpg


Left is done too. I got the brake lines run but am not happy with the amount of adapters I had to use. Will be cleaning that up in the future.

A Tiger friend provided me a solution to the parking brake cable issue. I will post pics of it soon.
 

Duke

Donation Time
FINISHED!!!

So........let’s talk about the PITA brake cable. I decided to use the Tiger brake cable. It would need to be shortened with other modifications to work.

Pictured here it the RX7 cables. The one on the top I disassembled. I wanted to get the fitting off of the end to install on the Tiger cable sheath. It took some work to get the RX7 sheath out but it is doable with some patients.
001-11.jpg


Here is a pic of the RX7 end cap on the Tiger cable. I used different sized sockets with grease to flair the fitting back open using the vise. I then tapped it on the end of the Tiger sheath and used some 5 minute epoxy to make sure it would stay. I cut the cable with a Dremel cutting wheel, very clean cut.
005-6.jpg


I bought a "swagless" cable end fitting that ended up being too long to work. It was also for a 3mm cable and the Tiger cable is 3.5mm. So disregard the silver piece completely. The pivot piece that fits in the forks on the caliper I made from a brass T.
002-17.jpg


I thought it may be too soft so I screwed a steel bolt through the middle and then cut it off on both sides. Finally, I drilled a hole through the center.
004-10.jpg
 

Duke

Donation Time
I then turned to the cable length and way to crimp a stop fitting on the end.
First was to determine how much cable slack is needed on the handbrake side, it was 1 1/4"
006-7.jpg


Making sure that the cable stays in place, I then attached the cable to the caliper and determined the length needed there. Pic of cable fitting already swaged.
009-4.jpg


I used a "Swaging Tool" I bought at Home Depot for $27 to properly "swag" the aluminum fitting in place.
008-2.jpg


Pic of the left caliper installed with the parking brake in place. It takes four clicks to fully engage it....perfect!
011-2.jpg
 

Duke

Donation Time
Here is the mess of adapters I used to get the brake lines installed. What I need is a T that goes from a bubble flare out to two double flare fittings.
010-2.jpg


Right side finished.
014-2.jpg


Left side finished.
013-1.jpg
 

Duke

Donation Time
How beautiful is that....rear disk brakes.......it was soooooo easy.;)
015.jpg


Total price: ~$400.
 

alpine_64

Donation Time
Duke,

The end results are really nice, its good that you pent the time to clean and prep everything properly, makes the install look factory fresh. I cant remember if you have the booster still hooked up, if not might be time to play around with the master setups to get some better feel with the new all disc setup.. or, switch to a dual system which would be ideal.
 

Duke

Donation Time
Duke,

The end results are really nice, its good that you pent the time to clean and prep everything properly, makes the install look factory fresh. I cant remember if you have the booster still hooked up, if not might be time to play around with the master setups to get some better feel with the new all disc setup.. or, switch to a dual system which would be ideal.

Thanks!

I have a Lockheed booster. I am planning on using Dale A's from vented rotor kit for the OEM front calipers. Once that is in, I will see how the bias is and then look at different pads and then possibly a master cylinder change.
 

64beam

Donation Time
Hi Duke,

Have you been out for a road test yet and if yes, how did they performance in the current setup?

Thanks, Robin.
 
Top