Bill - do you have the rear glass and are just waiting to fit it? I have a Series 2 top, (similar rear window shape), but the plexiglas rear window is destroyed. I am going to attempt to heat shape some plexi (or whatever) to reproduce the window, and wondered if anyone has attempted such. Done some Youtube exploration, and it seems possible. SS used to have the rear window, not anymore.

-
Welcome to the new SAOCA website. Already a member? Simply click Log In/Sign Up up and to the right and use your same username and password from the old site. If you've forgotten your password, please send an email to membership@sunbeamalpine.org for assistance.
If you're new here, click Log In/Sign Up and enter your information. We'll approve your account as quickly as possible, typically in about 24 hours. If it takes longer, you were probably caught in our spam/scam filter.
Enjoy.
You are using an out of date browser. It may not display this or other websites correctly.
You should upgrade or use an alternative browser.
You should upgrade or use an alternative browser.
Parrish Tops
- Thread starter Bill Blue
- Start date
Yes, I have the rear glass. It is in decent shape, but scratched. I'm thinking of painting it with clear coat. Plexiglass is so soft I think the paint is more resistant to scratches.
A guy on the Locost board says that 1/8" Lexan is very flexible and could probably be bent to fit the contour of the opening. It can also be heated and bent to a new shape. I think a curved shape would be pretty difficult. Maybe if a guy made a form?
If you want, I can trace the shape of the window and send it to you.
Bill
Since others appear to be interested in the Parish tops, I'll add this pic.
The inside of the stock top has the same contour as the exterior. That means there are some strange nooks and crannies. I filled them with body putty. I cut a radius on an applicator to give it the shape I wanted.
Bill
The inside of the stock top has the same contour as the exterior. That means there are some strange nooks and crannies. I filled them with body putty. I cut a radius on an applicator to give it the shape I wanted.
Bill
Thanks for the offer of tracing the window. I actually still have a plexiglas window in my top, it is split in two places, not all the way through. If I am careful extracting it I will have a full piece to use as a form. Glue it up for strength, sheet it with aluminum foil and then heat some plexiglas to curve and fold around it. Cut to size. It all seems to work out so well in my head....
I think you have a pretty good handle on the process. I think you should probably reinforce the plexiglass. Maybe a couple of pieces of plywood cut to the contour and glued to the backside of the plexiglass.
It is always good to think your way through a process. If you cannot imagine a solution to a problem, your very unlikely to come create one on the fly. I've also found it is a dynamite way to put yourself to sleep at night!
Keep us in the loop. I may be in the market for a Lexan glass, depending on how the clear coating works. BTW, the guy that was promoting Lexan was doing so as a safety issue. Plexiglass breaks into shards like glass. Lexan does not.
Bill
mikephillips
Donation Time
If you mold a new one around the outside of the original keep in mind you may find the corners are too far apart to fit. By taking a thin slice out of the old one in the center, twice the thickness of the plexiglass, the one made around the outside should be the correct size. Better might be to make a mold of one or both sides and either drap the heated plexi on it or clam between the two.
The golden gem in this club is the discussion that goes on. For a novice, reading the process that you guys go through is incredibly valuable.
So, some type of ply mold as Bill suggests, in consideration of the shaping as suggested by Mike, should give some level of accuracy, if it can be done. It will be interesting to try, nonetheless. Have to look at the Lexan vs Plexi question, to see which is easier to bend. may be the over riding consideration, at least for me.
So, some type of ply mold as Bill suggests, in consideration of the shaping as suggested by Mike, should give some level of accuracy, if it can be done. It will be interesting to try, nonetheless. Have to look at the Lexan vs Plexi question, to see which is easier to bend. may be the over riding consideration, at least for me.
Here is the freshly clear coated rear window. Even with my crappy paint job, it looks better than it did. Prior to painting, I went over it with 1000 grit wet to provide a little tooth. There were a couple of crazed spots that disappeared when clear coated. Now to let it hardened a couple of days, sand and buff. Hope it lasts.
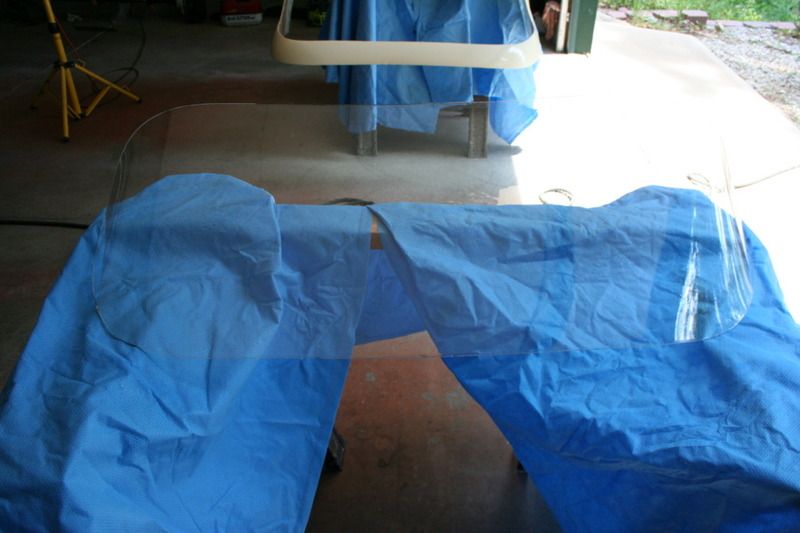
You can see a portion of the repainted and clear coated top, also needing sanding and buffing. To me, the Santa Fe had a green tinge that I did not like. This is Ford French Vanilla, a color I just love.
Bill
You can see a portion of the repainted and clear coated top, also needing sanding and buffing. To me, the Santa Fe had a green tinge that I did not like. This is Ford French Vanilla, a color I just love.
Bill
Stephen
Silver Level Sponsor
smooth line has glass 135
Description Price
Rear Plexiglas window (clear) $135.00
Rear Plexiglas window (smoke gray tint) $160.00
Rear window rubber $60.00
Windshield (leading edge) gasket $20.00
Side window rubber - per side $60.00
Rear deck rubber $70.00
Rear hold down assembly (stainless steel) - per side $40.00
Headliner material (charcoal) $70.00
Bright Trim Package $200.00
*Please allow 2-3 weeks for processing
*Shipping charges are extra and will be quoted after receipt of your order.
*These parts are specifically made for your order and are not returnable for any reason.
*Minimum order is $50.00
To Order Call 1-877-368-4533
DavidHodges11
Donation Time
tops
they were bought out by smooth line. they sale seals glass and all.")
they were bought out by smooth line. they sale seals glass and all.
Many years ago a friend of mine and I made a rear screen mould with my dads help (he was a cabinet maker) for the late model steel tops. Basically we used two lengths of timber which formed the side rails of the mould. Scribed the rear screen profile, top and bottom on these rails and routed the curve on these. The router groove needs to be the same width as your plywood material which need only be, say 5mm (1/4" - 5/16"). and deep enough to hold the ply, say 10 -15 mm
Next form the ply into the grooves and secure with glue and screws. The ply should be covered with some old blanket material to provide a smooth surface to lay the perspex on.
You now have the basic shape albeit only a single curve and not compound. If you want to spend a whole lot more time you could attempt to make the compound curve by ribbing the ply but we found this was not necessary as the finished results were more than adequate.
We then used a length of old blanket, secured at one end, which when stretched over the perspex, applied some pressure to help it form the perspex into the mould shape.
The mould, with flat perspex in place, was put into a pizza oven until the desired shape was achieved.
We got the rear glass installed. A couple of tips/observations.
#1, your not going to install a window that has not been bent to close to the proper shape. Installing a prebent widow is a tough job!
Installation procedure: run tape around the opening, so the rubber seal will slide over the headliner. If you look at the seal in cross section, it is not symmetrical. One edge is square, the other is rounded. Install the seal so the square edge is on the outside. We lubricated the portion of the rubber seal that slides over the top. Not a good idea. Yes, it facilitates installation of the seal, but it also allows the seal to slide off pretty easily. Lube the channel the window slides into and install the window from the inside of the top and work on the outside. Start in a corner, then switch to the other corner. Takes a lot of muscle! We needed three people, two to muscle it in, one to hold the top in place. Two just could not do it.
At some point, the design of the side glass seal has been changed. The new style does not like to follow the bend in the window opening, it flattens out. To compensate, the factory slits the seal and installs a piece of 1/2" (or so) round rubber. This does not work for diddly. It is way to thick and holds the glass away from most of the length of the glass. If you purchase new side widow seals, try to get it unmodified. I think unmolested seal would work better. I inserted a small piece of plastic in the seal to give it the proper bend and keep it from collapsing. Have not test fitted the top, so do not know how well it works. I'm pretty sure it will be better than "as modified". If I'm happy with the results, I'll post more detail.
Bill
getsmartguy
Silver Level Sponsor
Steven, when you say 2 hold down assemblys, if you mean the triangle back window assemnly that holds in the plexiglass window- yes I'd like to buy a pair-along with anything else that I would need to install- screws, hinges? I'm new to sunbeams and restoring, so if there's something else I would need, I'd love to get your input. The plexiglass back and side windows and rubber gaskets I have and bought from SS, along with 2 vent toggles I found on ebay.
I am trying to restore a hardtop for my Series V, and have no rear window assemblies, or the chrome for the back window, and am missing whatever screws/hinges I might need to complete the install, excepting the vent toggles.
Thanks, I'm looking forward to your response- the hardtop is actually at the upholstery shop now getting the headliner in, I'm so close to being done- except for the dang windows!
Can you help?
Thanks!
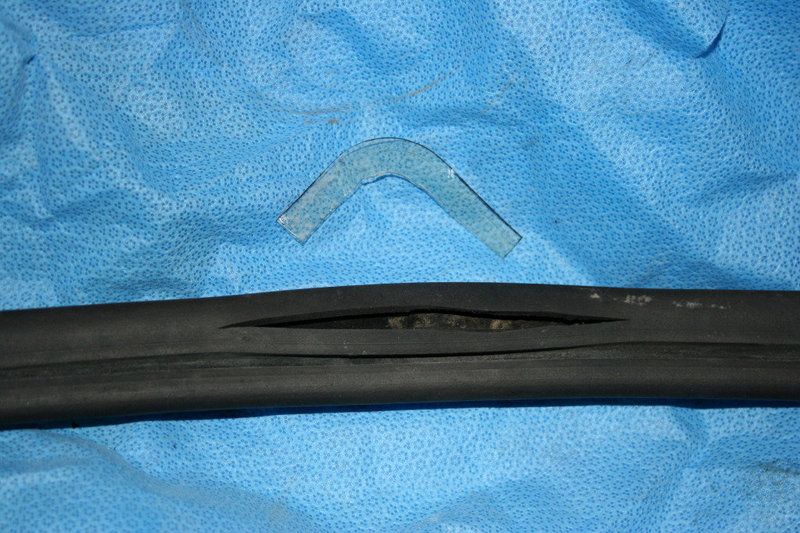
Here is my depiction of the seal as modified by the factory.

The seal and plastic form I used. It was inserted into the cavity and glued in place. The plastic in the photo is less than a sixtenth inch thick and is not up to the task. I used about 1/8" material.
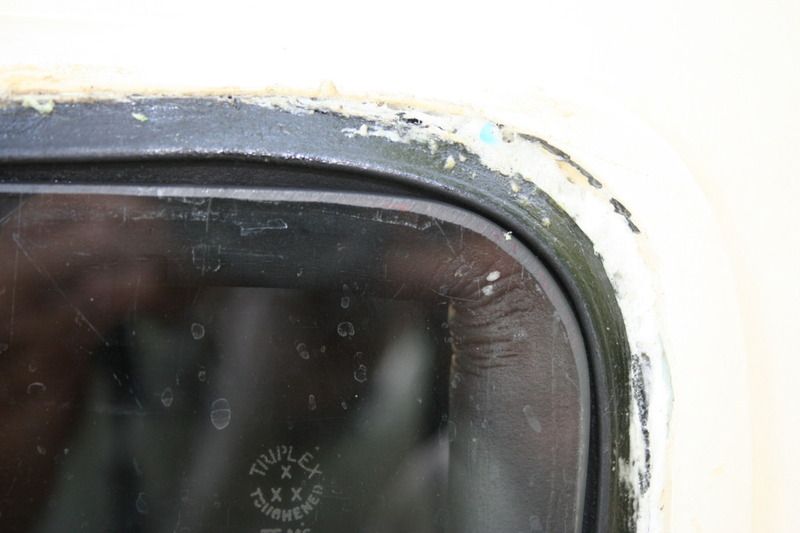
Here is the "new and slightly improved" seal. It now allows the glass to contact the seal for its full length. I'm not so sure ANY modification is necessary. If I was to do it again, I'd certainly try the fit without seal modification.
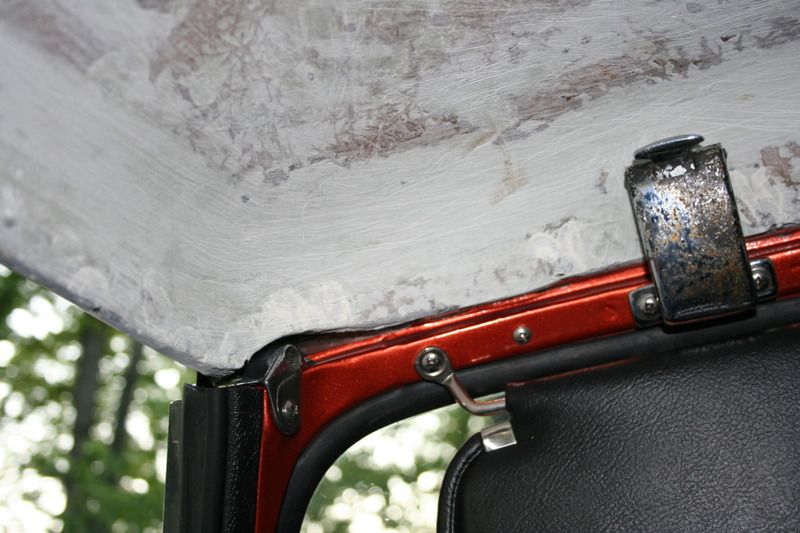
This is my final version of the rear hold down. Location of the eyelet was critical. It had to be located so tension of the toggle would tend to spread the top. It also had to have a low profile to clear the soft top as it is erected.
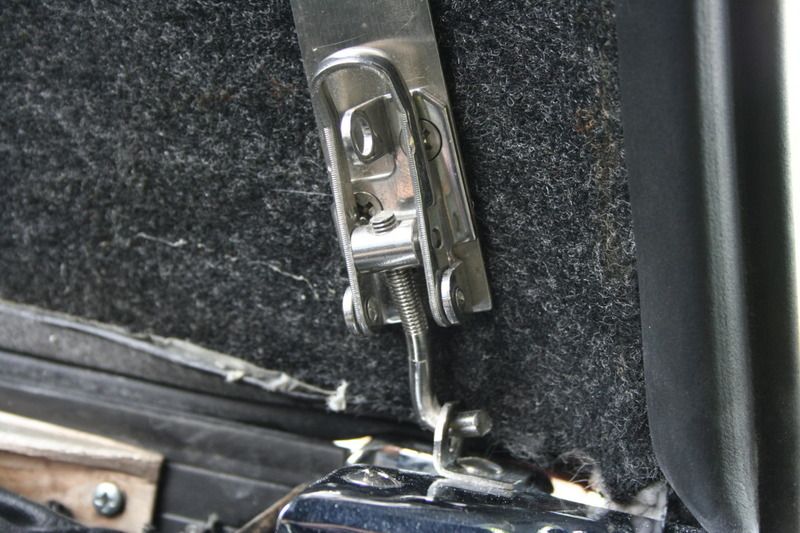
As you can see, the fit of the top is very imperfect, but it will do. I eliminated the fresh air intake, so a little air movement is needed. We just washed the car with the hardtop installed and it did not leak.
The seal and plastic form I used. It was inserted into the cavity and glued in place. The plastic in the photo is less than a sixtenth inch thick and is not up to the task. I used about 1/8" material.
Here is the "new and slightly improved" seal. It now allows the glass to contact the seal for its full length. I'm not so sure ANY modification is necessary. If I was to do it again, I'd certainly try the fit without seal modification.
This is my final version of the rear hold down. Location of the eyelet was critical. It had to be located so tension of the toggle would tend to spread the top. It also had to have a low profile to clear the soft top as it is erected.
As you can see, the fit of the top is very imperfect, but it will do. I eliminated the fresh air intake, so a little air movement is needed. We just washed the car with the hardtop installed and it did not leak.
It became evident that I had gone overboard when I raised the window opening. It now had to be "lowered" about a quarter of an inch. I decided to "raise" the side side panels. They were not cut out to match the "B" pillar cap, so I did so. Here is one marked and waiting for the rotary rasp.
After the rotary rasp.
Shortening the panel was a winner on all fronts. A big bonus was improved fit around the scuttle.
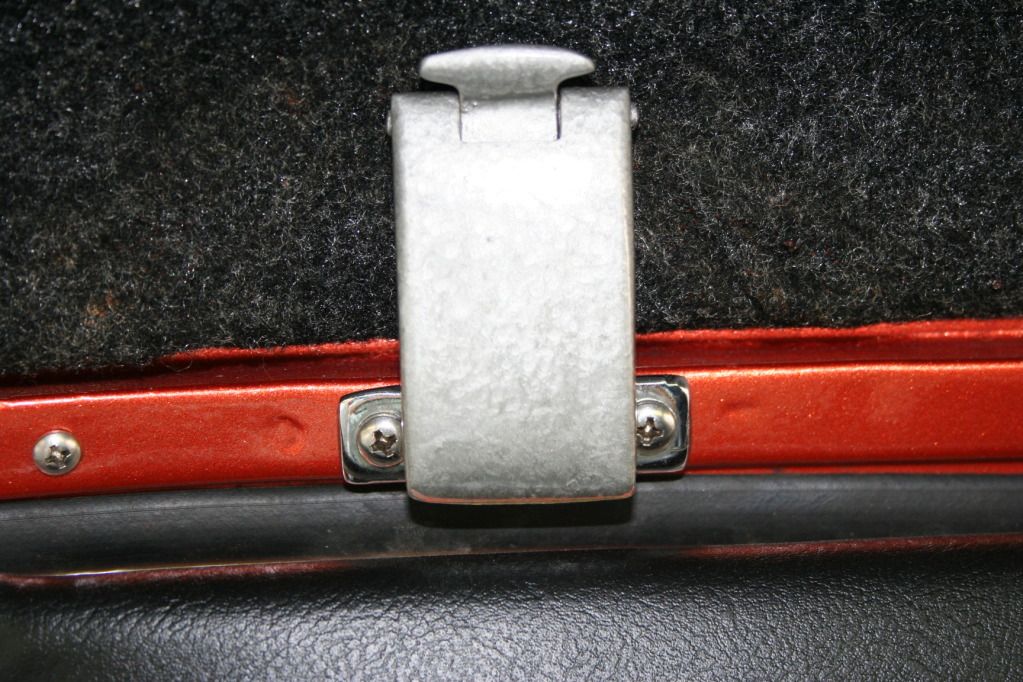
The top was factory drilled to accept the soft top buckles. I had a couple of very rough ones. You can also see the contour that I gave to the interior of the top.
Here is the buckle, cleaned up with P220 (wet) sandpaper and shot with Krylon HammerTone. It now matches the dash, gear shifter and wheels. Love that stuff.
The headliner is the one that was on the top when we got it. We vacuumed the snot out of it. Cleaned up pretty good.
Bill
After the rotary rasp.
Shortening the panel was a winner on all fronts. A big bonus was improved fit around the scuttle.
The top was factory drilled to accept the soft top buckles. I had a couple of very rough ones. You can also see the contour that I gave to the interior of the top.
Here is the buckle, cleaned up with P220 (wet) sandpaper and shot with Krylon HammerTone. It now matches the dash, gear shifter and wheels. Love that stuff.
The headliner is the one that was on the top when we got it. We vacuumed the snot out of it. Cleaned up pretty good.
Bill
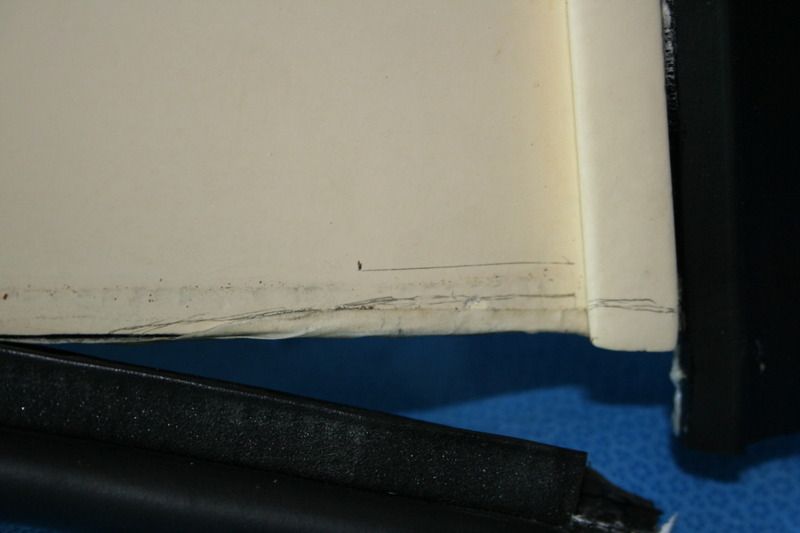
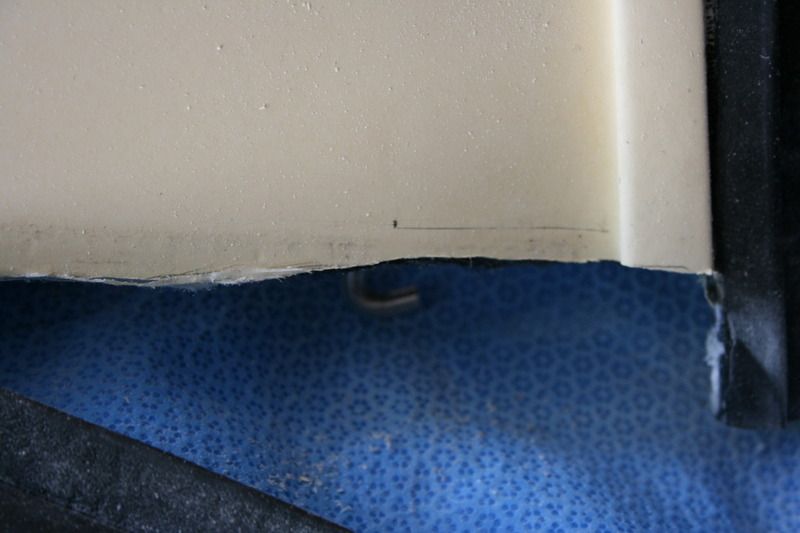
It took three tries to get the window seal properly installed. The vertical section in this photo appears to be there to locate and support the window seal.
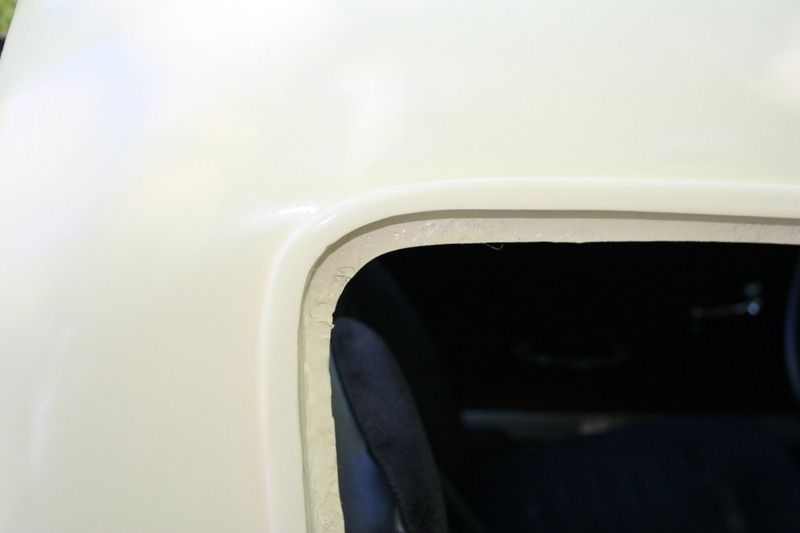
Not so. I think it is there to cover the backside of the rubber seal and finish the interior of the top. The seal location varies from against the vertical section to perhaps 3/8" away from it. The end result is some very messy glue deposits.
So there it is. The old Parrish tops can be modified to fit and give good weather protection. The costs are attractive. The top itself is usually unwanted and pretty cheap. The modifications cost $40 and lots of time. Rubber was $210 (plus shipping) and the rear hold downs were $20 plus shipping. I have a serviceable and presentable top for about the cost of a rough "stocker". Oh, did I mention they are lighter than the Rootes top? That's why I bought one!
Bill
As soon as the top was acceptable, we turned our attention to a way to handle and store it. The idea of overhead storage won out. So I ordered a small (420 pound capacity) hoist from Harbor Freight. Only a hundred bucks and seemingly well made. Made up a sling from stuff that was laying around and got it all assembled yesterday.
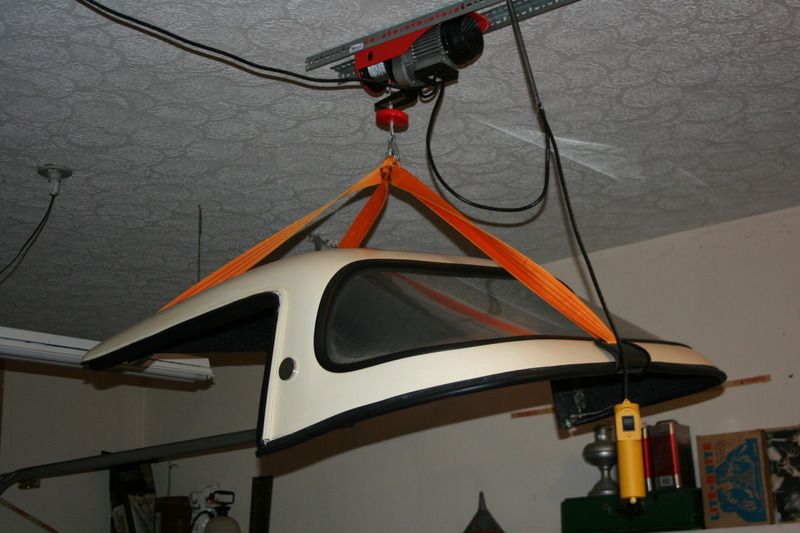
The webbing is from a flea market tow strap. If you make one one, plan on it taking about 15 feet of webbing. The rear attachment "hook" was fashioned from a 6" length of exhaust tubing.
Here is a link to the winch.
http://www.harborfreight.com/110-volt-440-lb-capacity-electric-hoist-with-remote-control-40765.html
Bill