
-
Welcome to the new SAOCA website. Already a member? Simply click Log In/Sign Up up and to the right and use your same username and password from the old site. If you've forgotten your password, please send an email to membership@sunbeamalpine.org for assistance.
If you're new here, click Log In/Sign Up and enter your information. We'll approve your account as quickly as possible, typically in about 24 hours. If it takes longer, you were probably caught in our spam/scam filter.
Enjoy.
You are using an out of date browser. It may not display this or other websites correctly.
You should upgrade or use an alternative browser.
You should upgrade or use an alternative browser.
Front Suspension Crossmember
- Thread starter jfcroni
- Start date
Bill,
I sandblasted and epoxied the crossmember from my car too and it is waiting for me to re-install it.
You mentioned doing some reinforcing. I haven't read anything about the crossmember needing additional reinforcement. What areas did you reinforce and do you have a Tiger or an Alpine? I know in a lot of cases more reinforcement is needed on Tigers than on Alpines.
Thanks,
Mike
Billm
Gold Level Sponsor
Crossmember
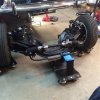
Mike I have a Tiger drivetrain in an Alpine body. I did the reinforcements from the CAT forum notes and Oneoffives internal reinforcement bracing ideas. Had Randy rebuild a arms and calipers soo while I was in there.....might as well make it safe.Bill
Mike I have a Tiger drivetrain in an Alpine body. I did the reinforcements from the CAT forum notes and Oneoffives internal reinforcement bracing ideas. Had Randy rebuild a arms and calipers soo while I was in there.....might as well make it safe.Bill
Attachments
AlsPine
Donation Time
Yes, the only 4 bolts.
Shoot some WD40 into the exposed threads on the forward bolt holes.
The bolts are a fine thread, haven't heard of anyone stripping the threads before.
Wire wheel the bolt threads before installing them and use anti seize on the threads.
If you have access to a welder, on the front 2 threaded posts that come through the frame where the cross member bolts go into, make a small 1/8" thick plate 1 1/2" wide or so, drill a hole through it large enough to slip over the threaded tube and weld the plate to the frame and the tube to the plate.
This will give a lot more strength and prevent any chance of pull through in case of a hard impact to the front suspension.
With the cross member out, check the the shock towers to make sure that they are 90 degrees to the cross member and correct it if they are not.
Also check for cracks where the towers are welded to the cross member.
I would weld a gusset from the tower to the cross member after correcting the angle of the tower also.
Last edited:
Crossmember
I just replaced my SII crossmember with one from a SV. I was surprised how easy it was to remove the 4 crossmember bolts - I expected a real fight. What's more, there is no access to the bolts on a SII so there was no opportunity to apply any penetrating oil. All I needed was an initial 1/4 turn on a breaker bar to break the bolts free. I did notice that in addition to the 4 crossmember bolts the SII cars also had a plate located immediately above the upper a-arm that bolted to the frame/body. It appears that this extra attachment must have been considered overkill by the Rootes engineers since they apparently eliminated the extra bracing on later series cars.
I just replaced my SII crossmember with one from a SV. I was surprised how easy it was to remove the 4 crossmember bolts - I expected a real fight. What's more, there is no access to the bolts on a SII so there was no opportunity to apply any penetrating oil. All I needed was an initial 1/4 turn on a breaker bar to break the bolts free. I did notice that in addition to the 4 crossmember bolts the SII cars also had a plate located immediately above the upper a-arm that bolted to the frame/body. It appears that this extra attachment must have been considered overkill by the Rootes engineers since they apparently eliminated the extra bracing on later series cars.
I'll check into making these fixes. The frame is 100% stripped down and on a rotisserie so now is the time to do it.
I already did the A-Arm strengthening welds, but I wan't aware of the crossmember issues.
The worst part will be having to sand off the new epoxy from the frame and cross member and then reshooting epoxy after adding strengthening welds.
It sounds like the 1/8" plate weld to the frame is hidden so maybe I can use a brush for touch up, but any welds to the shock tower will definitely require use of the gun.
But better safe than sorry. Thanks everyone for the information!!!
Mike
Billm
Gold Level Sponsor
Crossmember
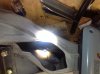
Mike I added plates to the outside of the shock tower and control arm mount. Put a weld bead around it and put a piece of steel in side the opening at the bump stop. Randy sent me photos of cutting holes in the front of the crossmember and putting 4 pieces of angle iron from top to bottom and then reweld the cut out pieces back in. I stitch welded around the bottom plate and the top piece. I also put a plate over the opening on the rack mounts. By plate I used 16 gauge steel. There ar CAT notes on the reinforcement procedure. Very helpful.
Mike I added plates to the outside of the shock tower and control arm mount. Put a weld bead around it and put a piece of steel in side the opening at the bump stop. Randy sent me photos of cutting holes in the front of the crossmember and putting 4 pieces of angle iron from top to bottom and then reweld the cut out pieces back in. I stitch welded around the bottom plate and the top piece. I also put a plate over the opening on the rack mounts. By plate I used 16 gauge steel. There ar CAT notes on the reinforcement procedure. Very helpful.
Attachments
65beam
Donation Time
front
reinforcement of a cross member is not required in an alpine. the cross member was modified for use in tigers by cutting away sections to install the rack. the tiger rack puts extra stress on the cross member that doesn't happen with the alpine steering.
tiger auto dips our cross members and does check all the welds and adds extra welds in areas that do show evidence of prior rust. this is usually along the flange where the top and bottom pieces of the cross member itself are welded together. we have found bulging from rust in this area. he also checks the width between the shock towers and readjusts if needed. Doug has already restored a series 5 cross member to set under the RHD LeMans and will soon start on another to set under the red Le Mans.
Because people have strong opinions about Grade 8 bolts, I normally don't comment about them, but I feel compelled in this situation to raise the matter.
It is my understanding that although Grade 8 bolts have a higher ultimate strength than numerically lower grade bolts, they are actually not intended for many or most applications. Because they don't stretch like Grade 5 bolts to, they have poor clamping characteristics.
Just a thought.
Paul
It is my understanding that although Grade 8 bolts have a higher ultimate strength than numerically lower grade bolts, they are actually not intended for many or most applications. Because they don't stretch like Grade 5 bolts to, they have poor clamping characteristics.
Just a thought.
Paul
George Coleman
Gold Level Sponsor
Very true, I guess the most useful tip would to lube your bolts with anti seize regardless of what you use. 
LarryN
Diamond Level Sponsor
On the subject of Grade 8 bolts, it is correct that they are higher strength steel and that the elongation to failure is typically less than the lower grades. However, the elongation is a combination of elastic stretch and, after the material yields, plastic or permanent deformation. Grade 8 bolts have a higher yield strength, meaning they can be torqued to greater values without permanent deformation. Since the clamping force is directly related to torque (in well-lubricated joints), the Grade 8 bolts can generate higher clamping loads. That said, the Grade 8 bolts will break if torques much beyond their yield stress - lesser grades will also break of course and the material is in a stress regime where small changes in torque can cause failure.
In high-strength joints for critical assemblies, Grade 8 bolts are sometimes torqued to the theoretical yield and discarded if the joint is disassembled.
I don't know if it is still a problem, but Grade 8 and (to a lesser extent) Grade 5 fasteners were frequently counterfeited. It is difficult to detect counterfeit bolts even with extensive testing - the best insurance is to buy from reputable sources.
Here is the apparent problem with the concept of 'Grades' (quoting Larry N); lesser grades .
I don't believe that the concept of 'grading' bolts was intended to convey better or worse ("lesser") quality, I believe that it was intended to convey different qualities; which bolts have a greater range of stretch (thereby maintaining clamping forces over a wider range of movement), which bolts will easily bend in a plastic manner (grade 2 bolts) which will allow deformation of an assembly without a bolt failing (like swing sets), notch sensitivity, fatigue life, etc.
Harder bolts (numerically higher numbers) have a lower fatigue life, less stretch, more notch sensitivity.
I'll use a good quality Grade 5 bolt in most applications. I'll use a factory Grade 2 bolt for clamping the bellhousing to the block. YMMV.
Peace,
Paul